In part 1 we did a full inventory of the current infrastructure. The takeaway was clear: the network is the first bottleneck. Everything runs at Gigabit, everything goes through the ISP router, no segmentation, no visibility. Before touching the homelab or home automation, we need to lay down solid network foundations.
In this article we’ll look at why the current setup no longer cuts it, what architecture I’ve come up with, and the gear I’ve ordered to make it happen.
Current limitations#
As a reminder, today everything relies on the Freebox Ultra (the router provided by my ISP, Free). It’s an excellent consumer router — the OS is genuinely feature-rich for an ISP device — but there are limitations I’d like to get rid of, namely:
No VLANs: This is the biggest blocker. Everything sits on the same network: my PCs, IoT devices, the homelab, guests. The most critical point is the smart devices — right now they can access the internet without any filtering, and I have no visibility on which remote servers they’re sending data to. Not ideal.
Capped at Gigabit: The fibre pushes 8 Gbps symmetrical, but the Netgear switch in the office is Gigabit and the Freebox only offers 2.5G and 1G on its ports. We’re far from using the available bandwidth.
No visibility: Impossible to know which device is consuming what bandwidth, who’s talking to whom, to set up QoS, or simply to get network stats. The Freebox does its job as an internet gateway but that’s where it stops, and it’s not enough for me.
Locked into the Freebox OS: The Freebox OS is one of the most complete among ISP routers, but it’s still limited. No advanced firewall rules, no inter-subnet routing, no custom DNS beyond the basics.
Wi-Fi isn’t optimal: The Freebox’s Wi-Fi 7 is decent and the Free repeater does the job, but there’s no way to manage SSIDs per VLAN, set up a captive portal for guests (I think it’s doable but quite limited), or properly monitor connected clients.
Target architecture#
The idea is to take back control of the network without revolutionising everything at once. We keep what works and add the missing pieces.
Keeping the Freebox (no choice)#

With Free, the fibre terminates directly inside the Freebox. There’s no external ONT that we could swap out. So the Freebox stays at the head of the network, but we’ll limit it to a single role: fibre modem. Everything else will be handled by a proper router/firewall behind it.
To do this, the Freebox will be set to DMZ mode (or bridge mode): it will forward all traffic to the router sitting behind it. No more DHCP, no more DNS, no more Wi-Fi. Just the fibre link.
The router: UniFi Cloud Gateway Fiber#
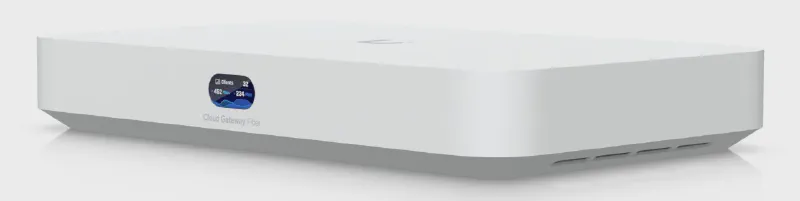
The heart of the new architecture will be a UniFi Cloud Gateway Fiber (UCG Fiber). It’s a UniFi router/firewall that ticks all the boxes:
| Specs | |
|---|---|
| Uplink | 1x SFP+ 10G + 1x Ethernet 10G |
| Downlink | 1x SFP+ 10G + 4x 2.5 GbE ports |
| Features | Router, Firewall, VLANs, DPI, IDS/IPS, VPN |
| Management | UniFi Network (local + cloud) |
The link between the Freebox and the UCG Fiber will be 10G via an SFP+ DAC (Direct Attach Cable). We’re finally moving past Gigabit.
The 4 x 2.5 GbE downlink ports will serve as an integrated switch in the main rack, distributing the network to the different rooms through the patch panel.
The downlink SFP+ port will carry the 10G network to the second rack in the office — we’ll tackle that upgrade in a later article.
Wi-Fi: UniFi U7 Lite#
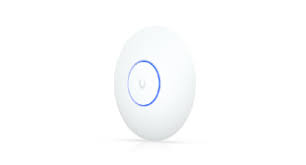
The Freebox’s Wi-Fi and the Free repeater will be disabled and replaced by two UniFi U7 Lite access points:
- One in the main rack, connected directly to the UCG Fiber — it will cover the main living area
- A second in the office rack, at the other end of the flat — it will cover the workspace
The advantage of UniFi APs over the Freebox’s Wi-Fi: each access point can broadcast multiple SSIDs tied to different VLANs. One SSID for the home network, another for guests, another for IoT. All managed from the same UniFi Network interface.
Planned VLANs#
Network segmentation is the main driver behind this overhaul. Here’s what I’ve planned:
| VLAN | Purpose | Access |
|---|---|---|
| Home | PCs, smartphones, tablets | Internet + local network |
| IoT | Smart devices, home automation | Limited internet, isolated from the rest |
| Lab | Proxmox cluster, OPNsense | Isolated, controlled access |
| Guests | Guest Wi-Fi | Internet only, nothing else |
| Management | Network administration | Admin-only access |
Each VLAN will have its own firewall rules on the UCG Fiber. For example, the Guest VLAN will only have access to the internet, and the IoT VLAN won’t be able to communicate with the Home VLAN (but Home Assistant will be allowed in to control the devices).
What stays the same (for now)#
A few things that will remain as they are and evolve in future parts:
- The Netgear switch in the office stays put. It’s the current limitation: it’s Gigabit and unmanaged, so no VLANs between the main rack and the office. It will be replaced later with a UniFi switch with a 10G uplink, but one step at a time.
- The homelab (OPNsense + Proxmox cluster) doesn’t change. The focus of this article is the network upstream of the lab. Homelab optimisation will come later.
- Home Assistant stays on the Raspberry Pi in the main rack for the time being.
The order#
Theory is all well and good, but at some point you have to take action. I’ve placed an order directly on the UniFi store:
- 1x UniFi Cloud Gateway Fiber — the router/firewall
- 2x UniFi U7 Lite — the Wi-Fi 7 access points
- 1x SFP+ 10G DAC — the Direct Attach Cable for the 10G link between the Freebox and the UCG Fiber
Everything should arrive within the next few days. As soon as it does, we move on to installation and configuration — that’ll be the next part!
What’s next?#
In part 3, we’ll get hands-on:
- Physically setting up the UCG Fiber in the rack
- Configuring the Freebox in DMZ mode
- Creating the VLANs and firewall rules
- Deploying the Wi-Fi access points
- First 10G speed tests
Time to finally get our hands dirty and start the full homelab and network overhaul!