In part 2, I laid out the target architecture on paper: UCG Fiber as the main router, the Freebox (my French ISP’s router, from Free) demoted to simply handing the network off to the UCG Fiber, VLANs to segment the network and two U7 Lite to cover the whole flat in Wi-Fi 7. The order had been placed, all that was left was to wait.
The parcel turned up in less than a week, so now we move on to the hands-on part.
Unboxing#
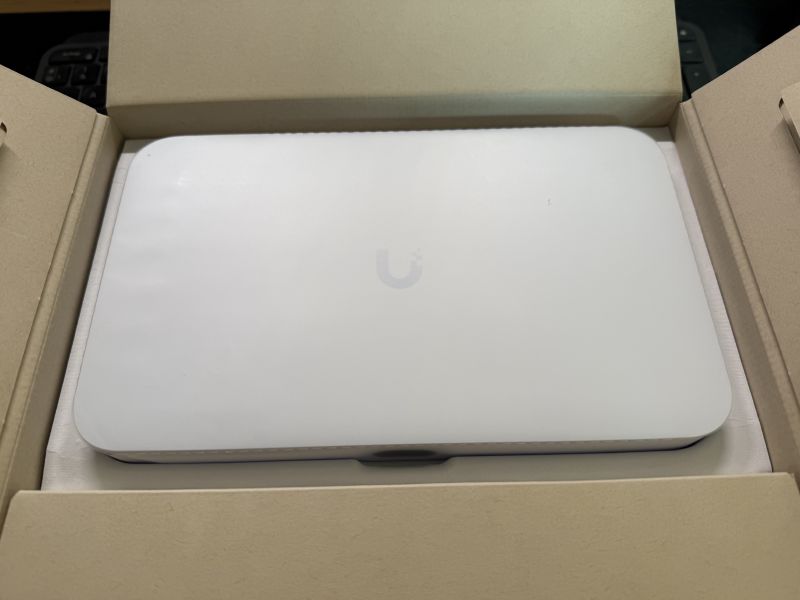
The UniFi box contained the four items I’d ordered:
- 1x UniFi Cloud Gateway Fiber - the router/firewall, in its understated little white box
- 2x UniFi U7 Lite - the Wi-Fi 7 access points, delivered with their wall-mount brackets
- 1x DAC SFP+ 10G cable - the Direct Attach cable for the link between the Freebox and the UCG Fiber
First impression: the unboxing experience is genuinely clean. The boxes are understated, well laid out, each piece of kit nestled in its compartment, accessories tucked away separately. You can tell real thought went into the user experience from the moment you crack the parcel open - it inspires confidence before you’ve even plugged anything in. The build quality follows suit: everything is compact, well finished, no frills. The UCG Fiber in particular is impressively compact for what it packs in.
First plug-in: configuration on the desk#
Before slotting the UCG Fiber into the rack and touching the Freebox, I started by configuring it in my office, plugged in via Gigabit Ethernet on the existing Netgear switch. The goal: get familiar with the UniFi Network interface, create the VLANs, configure the SSIDs, basically do all the configuration work before switching the network over for real. That way I avoid cutting off the whole existing network and it makes for a smooth migration.
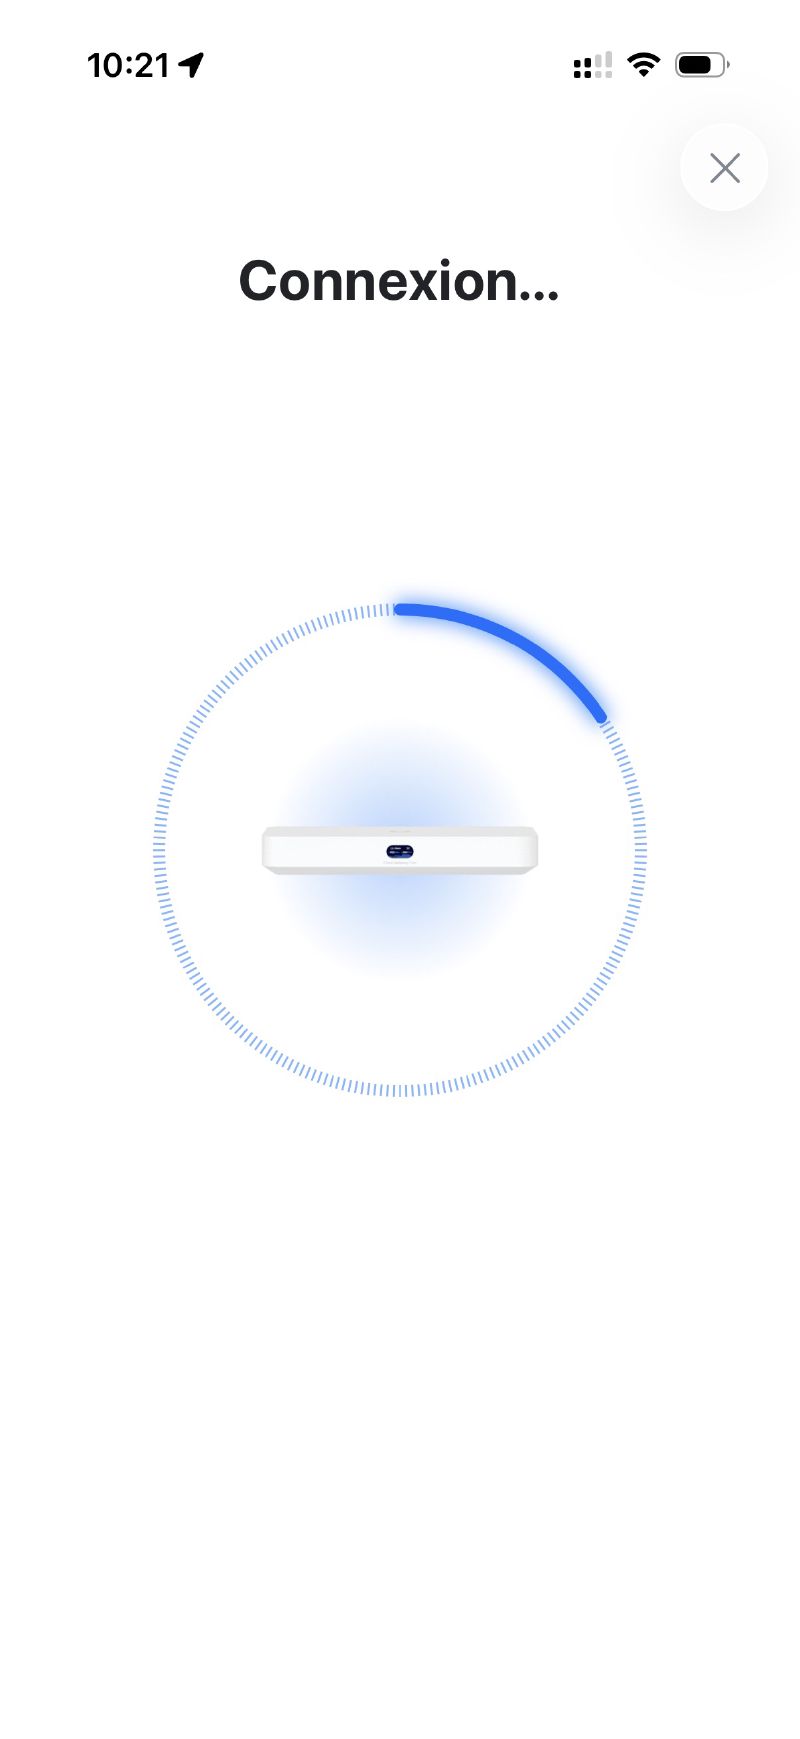
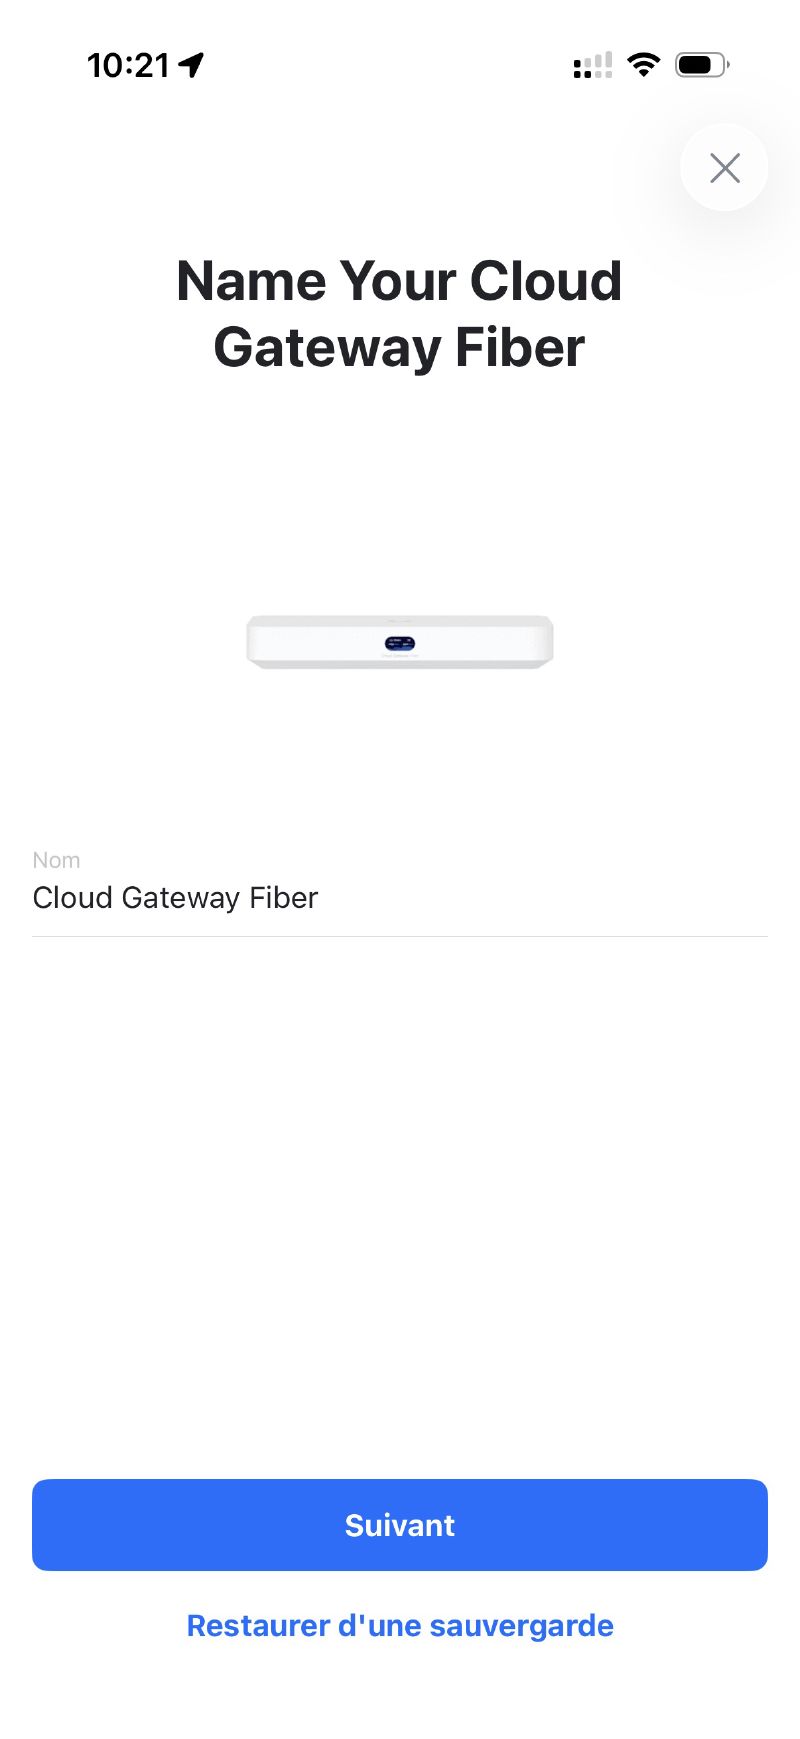
Once plugged in, I wanted to try doing the whole setup from my phone via the UniFi app. The onboarding is really well done: you scan the QR code on the UCG Fiber, the app detects the device and walks you through step by step. It’s clear, intuitive, no bugs whatsoever. Honestly we’re a world away from the experience of some consumer routers where you end up digging around in ageing interfaces. Here everything flows and it makes you want to dig deeper.
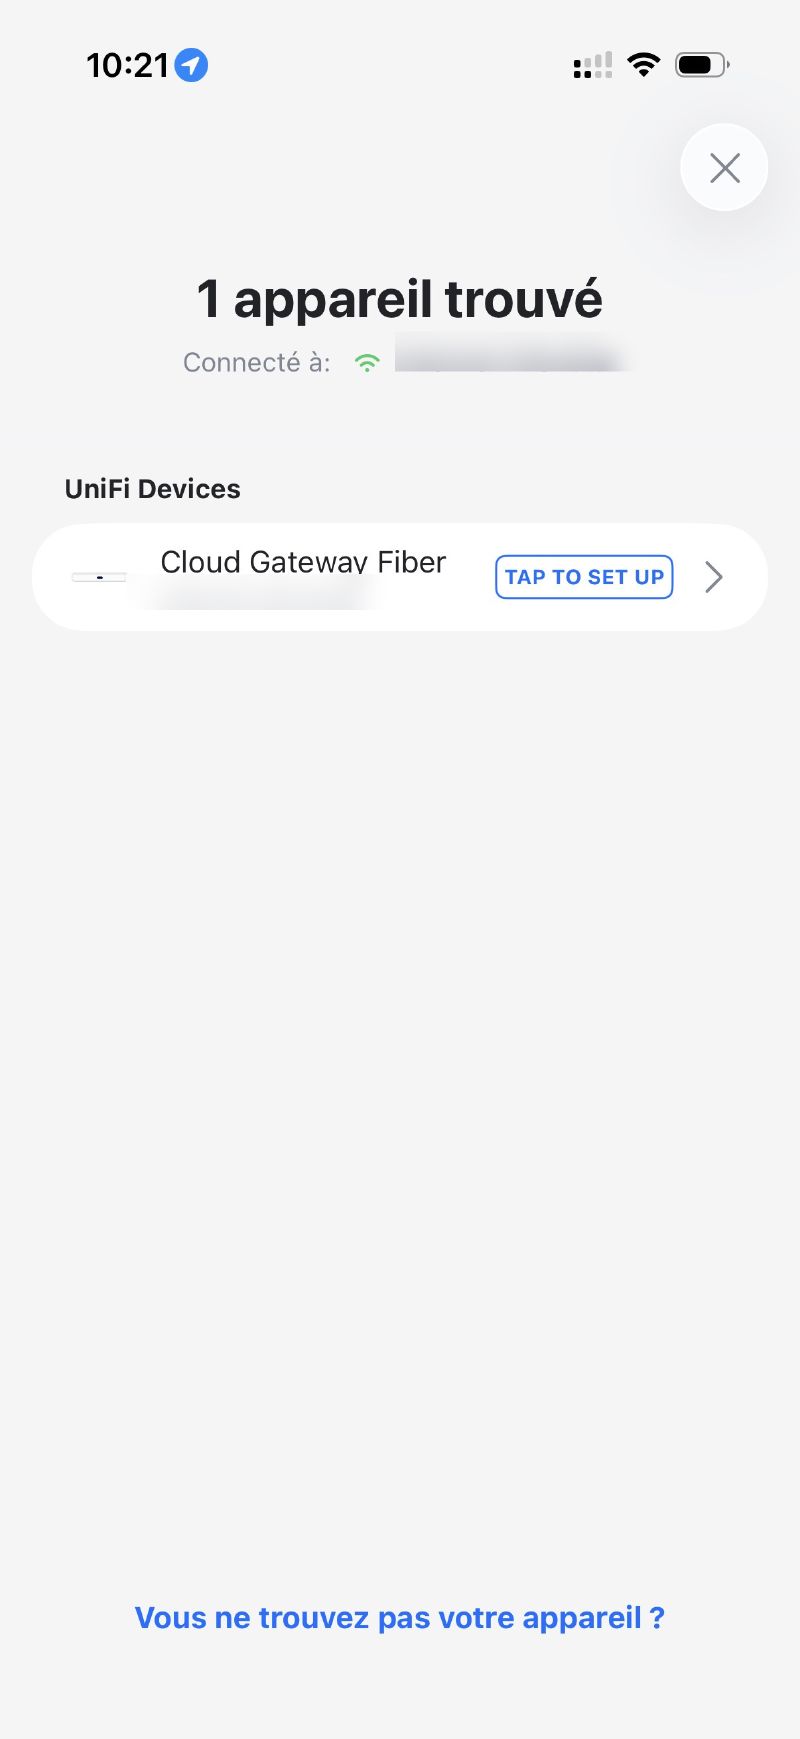

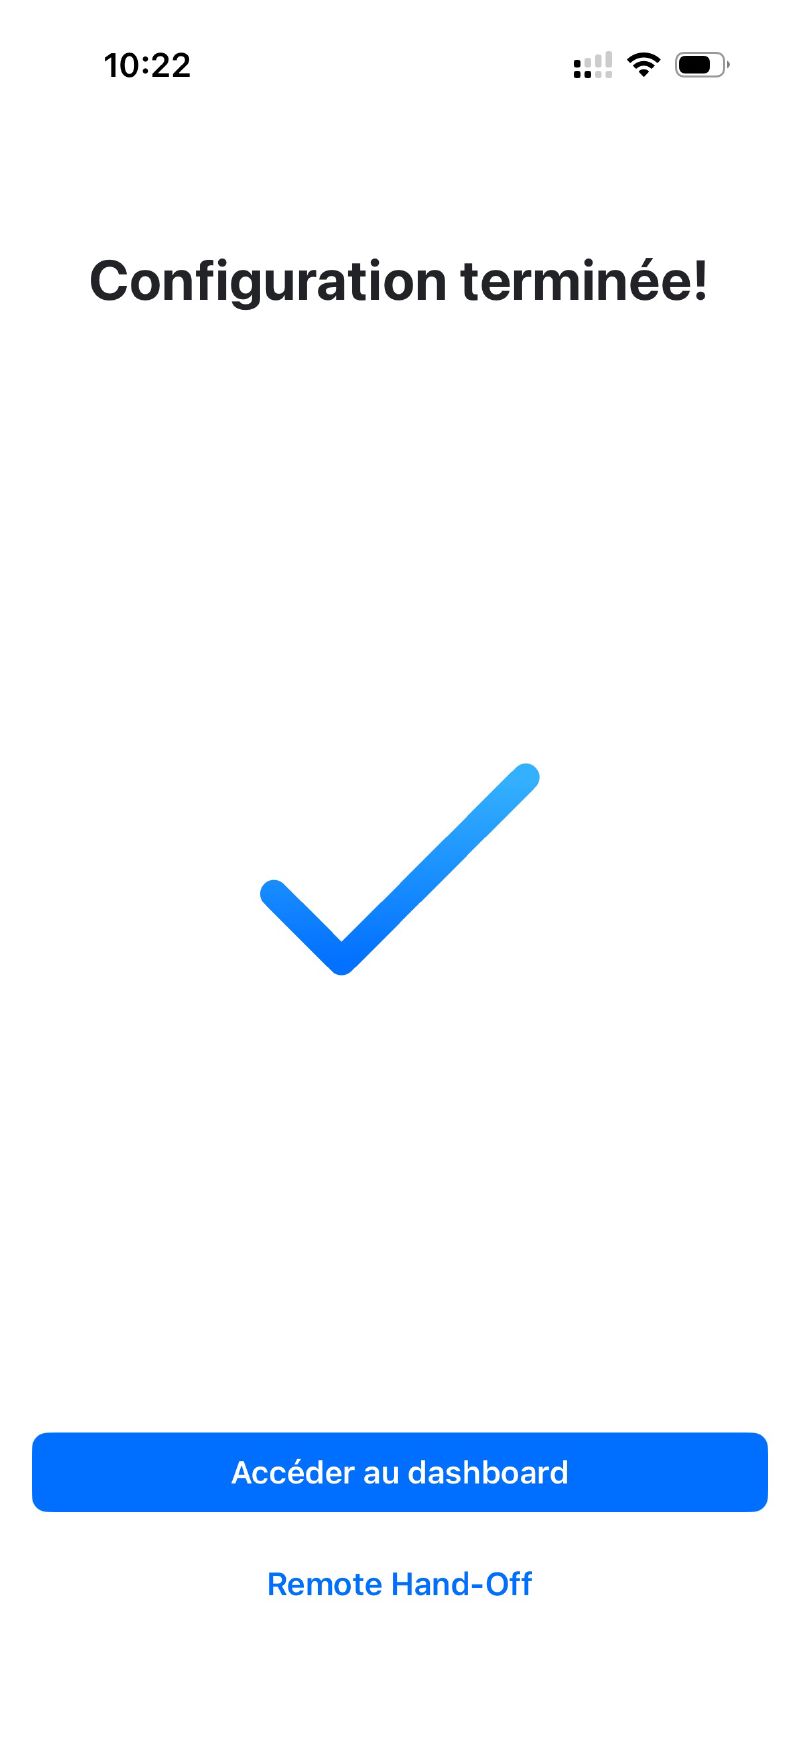
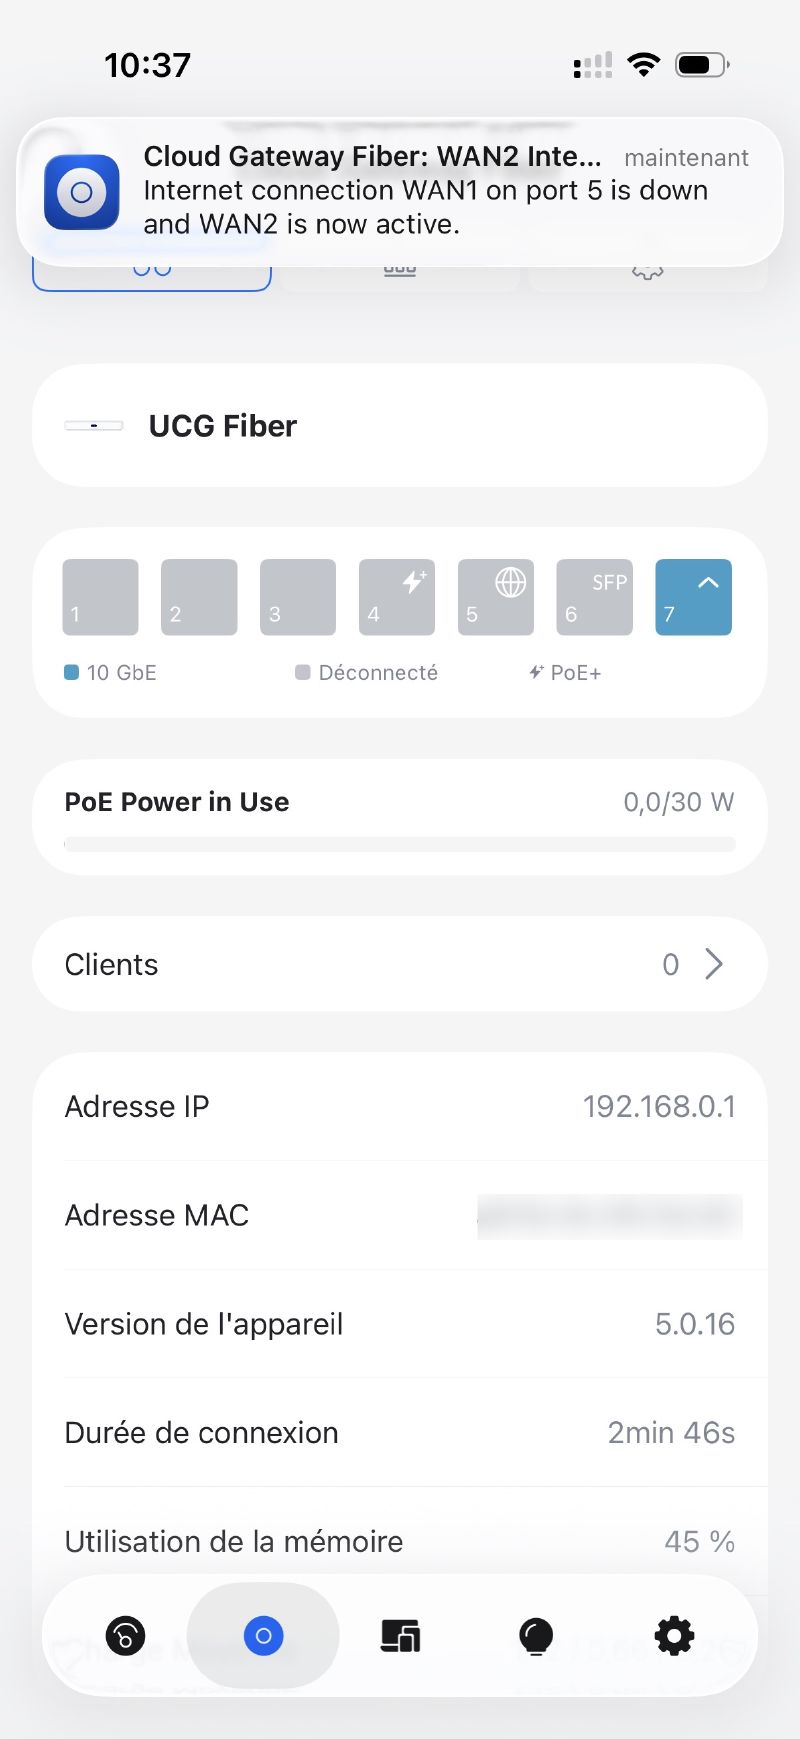
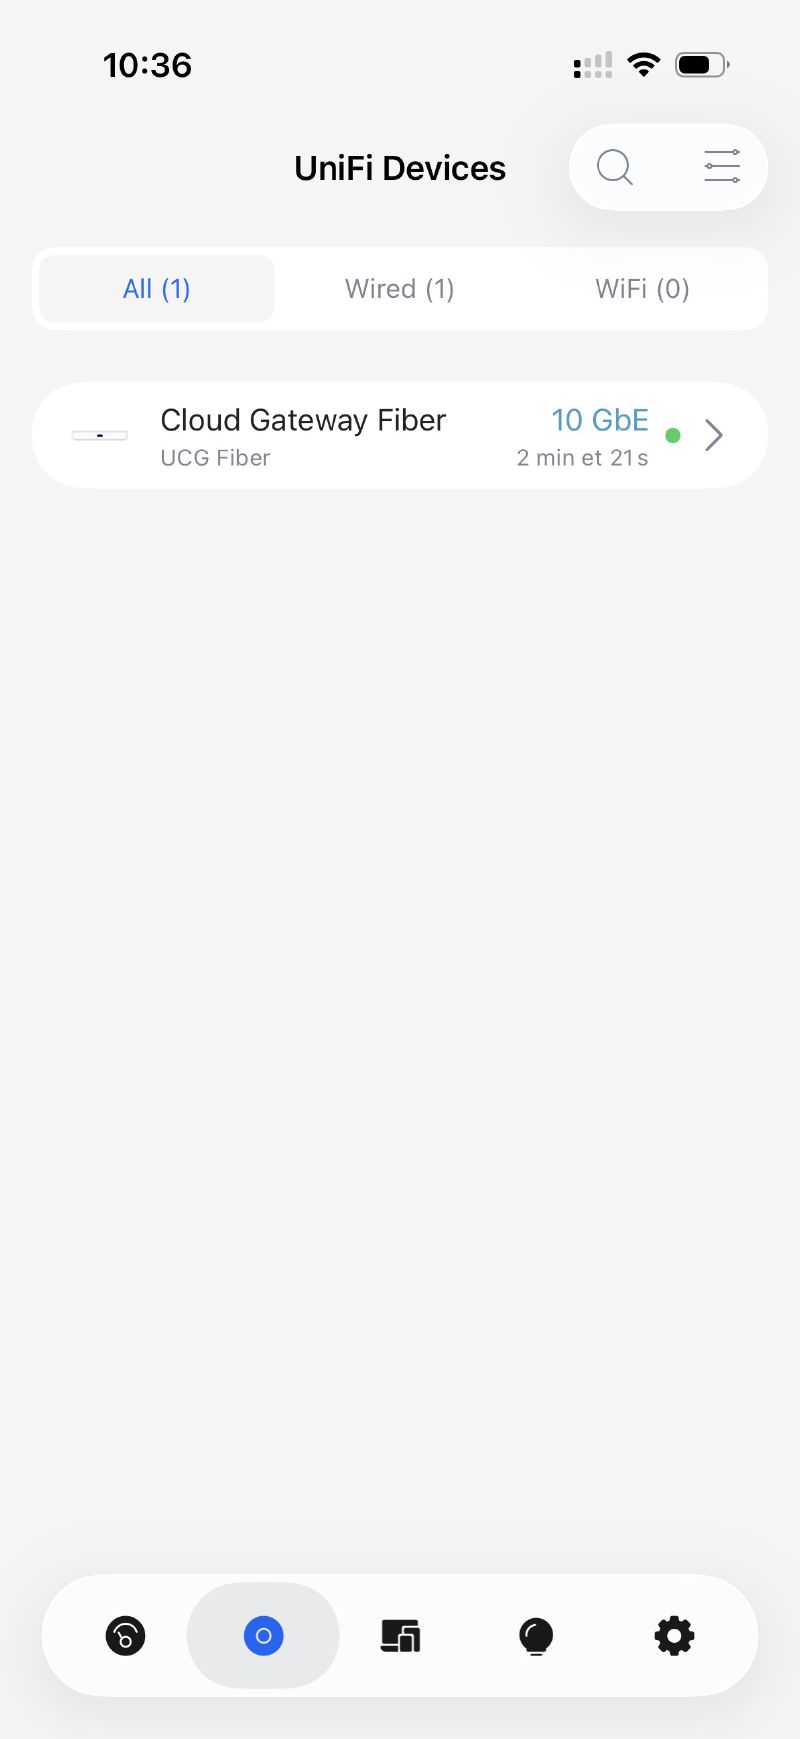
Once the device is registered and up to date, you get the overview: only the UCG Fiber is configured at this stage, with its ports and operating status.
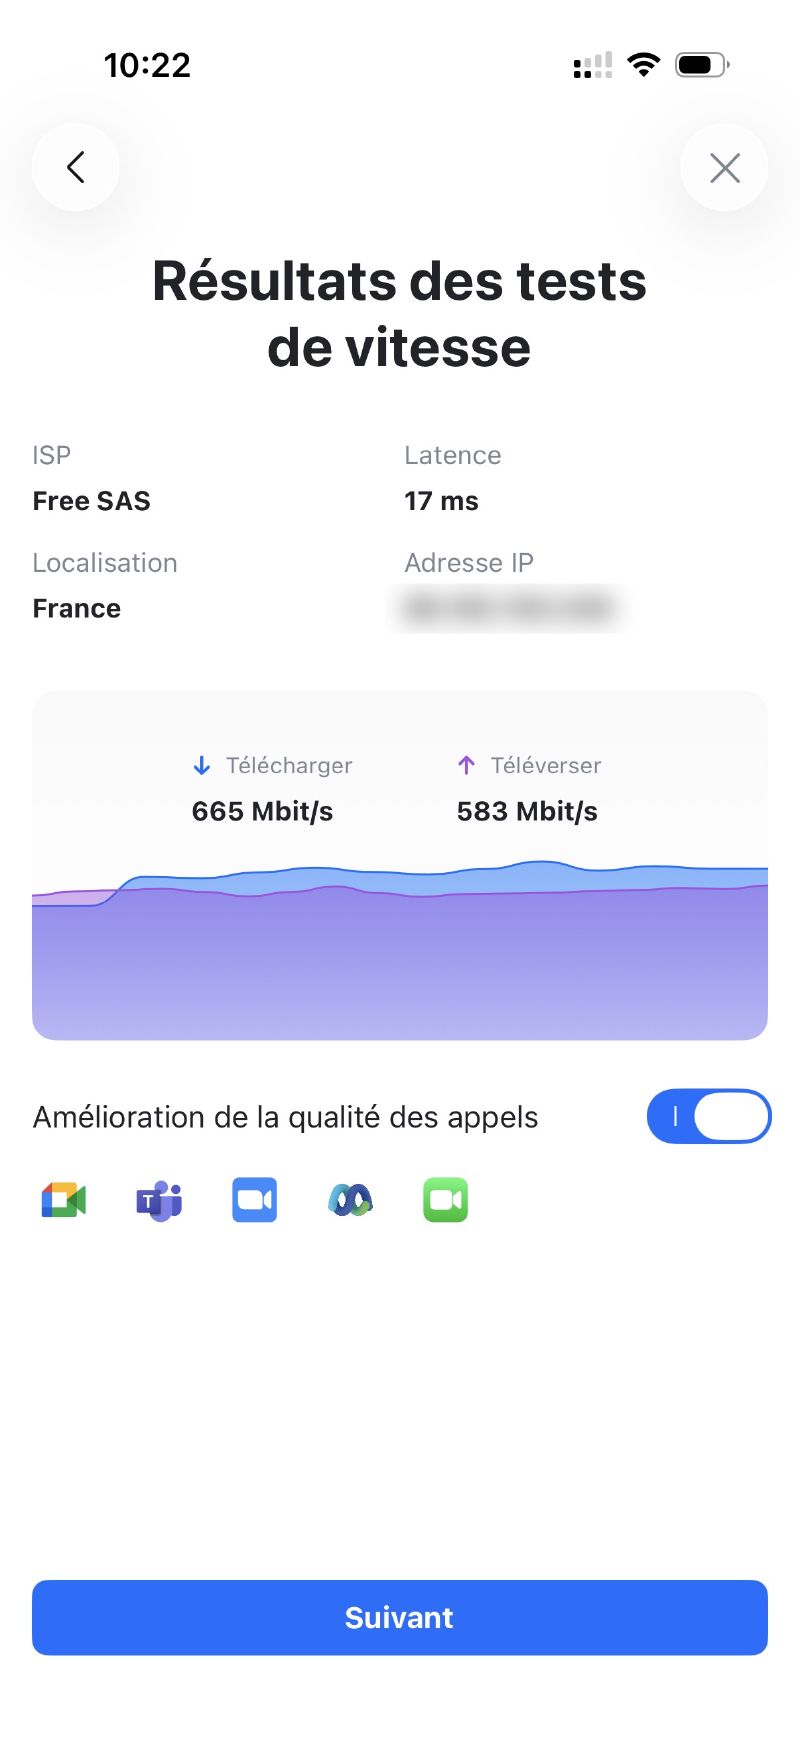
A first speedtest from the UCG Fiber, still behind the Freebox in router mode, confirms we’re still capped at the usual Gigabit (but not for much longer!).
Perfect, with that done we can move on to the final installation in the rack behind the Freebox.
Physical installation#
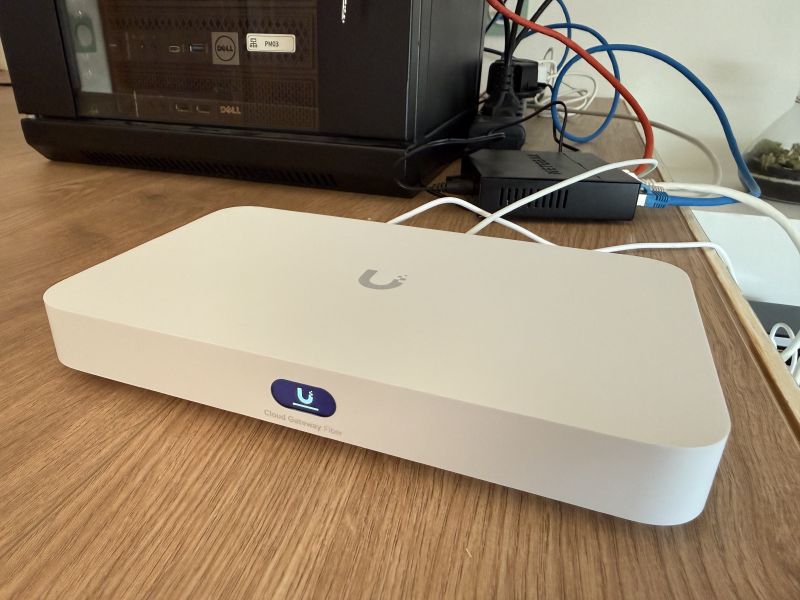
The UCG Fiber in the main rack#
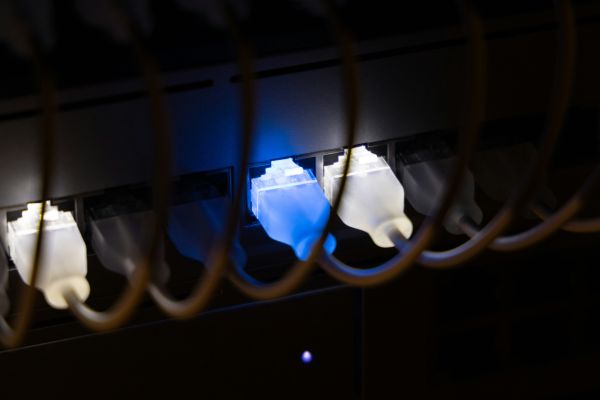
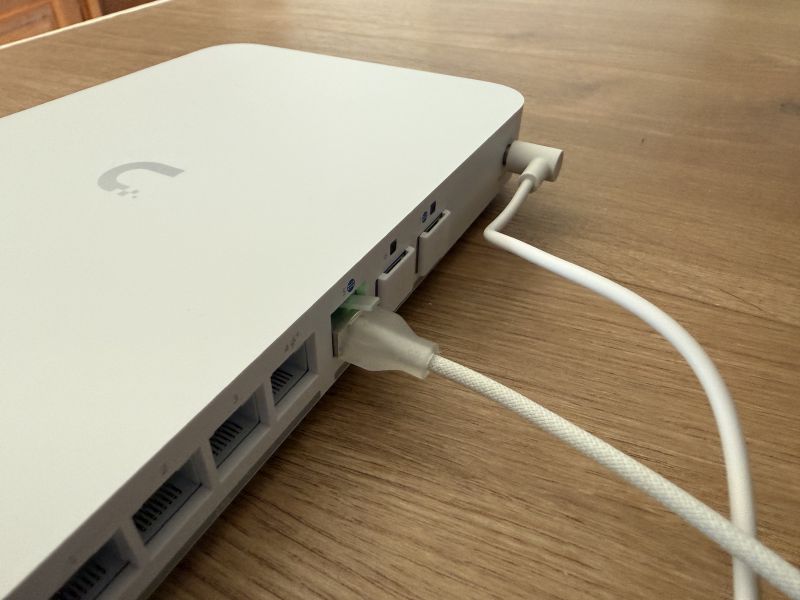
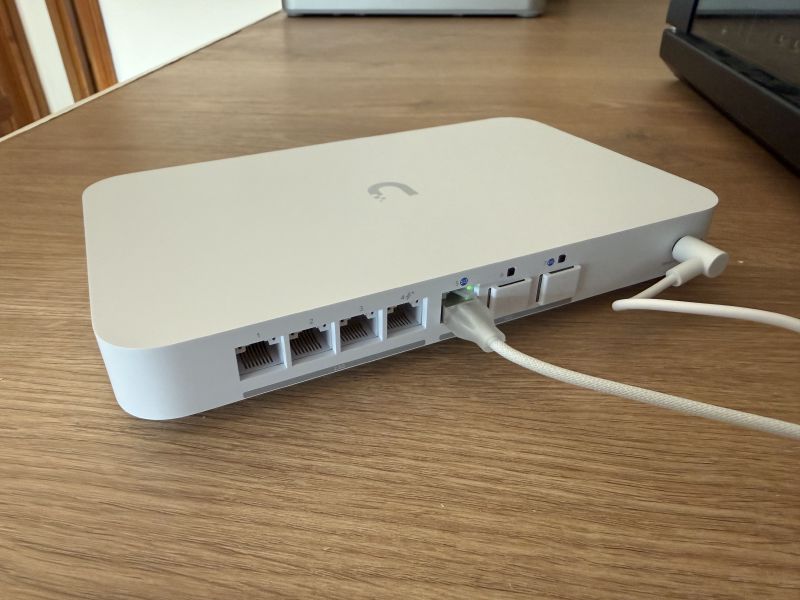
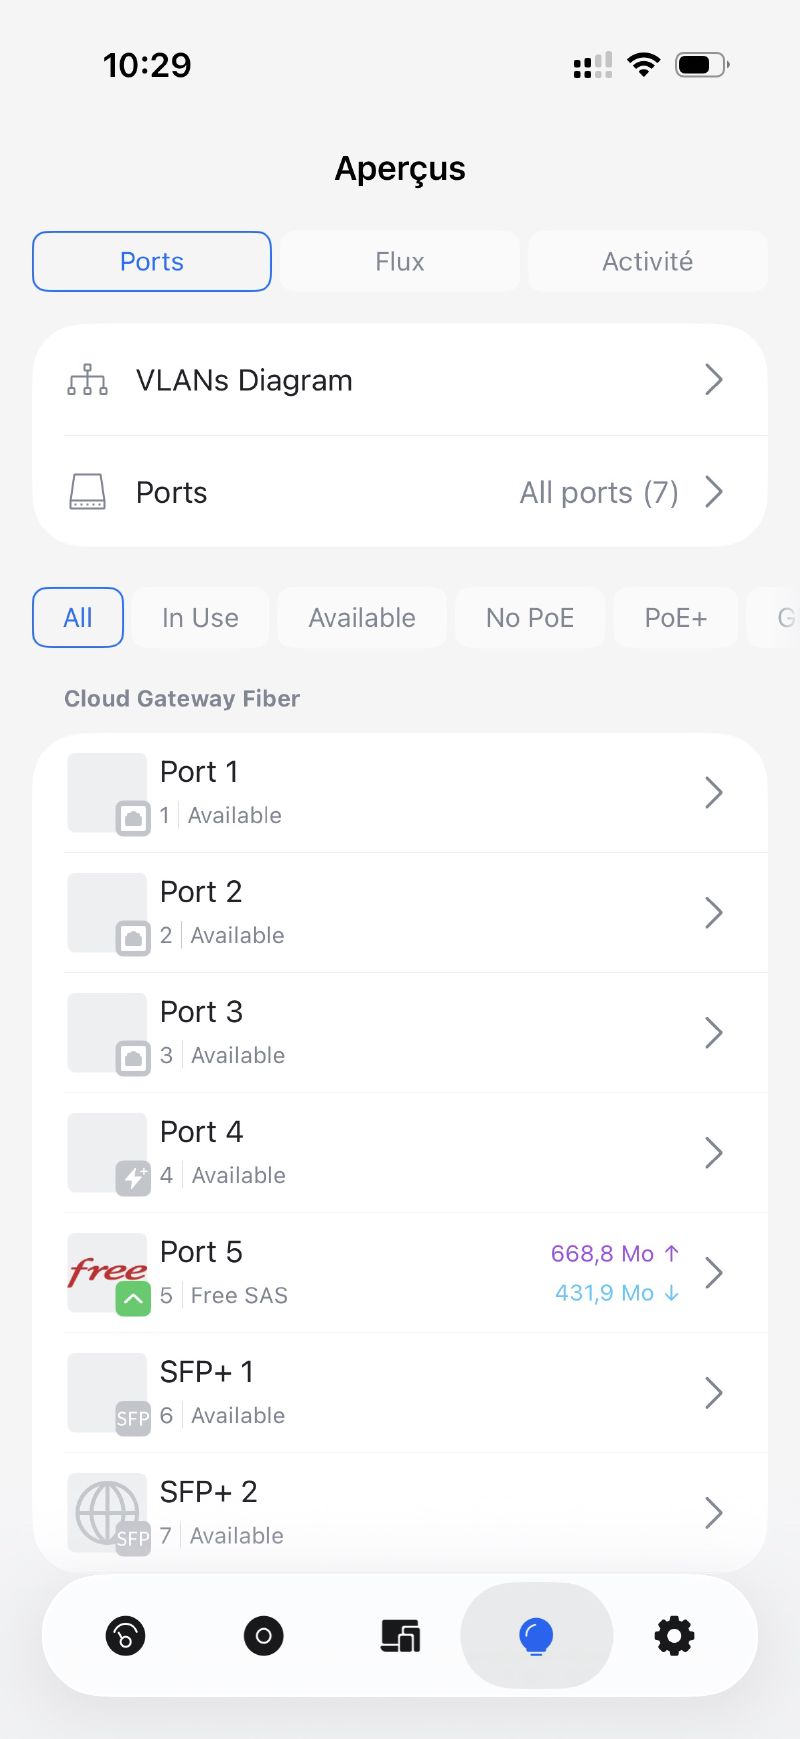
The UCG Fiber takes its place in the main rack next to the Freebox, a bit messy for now - we’ll tidy it all up later. The DAC SFP+ cable directly links the UCG Fiber’s WAN SFP+ port to the Freebox Ultra’s SFP+ 10G port.
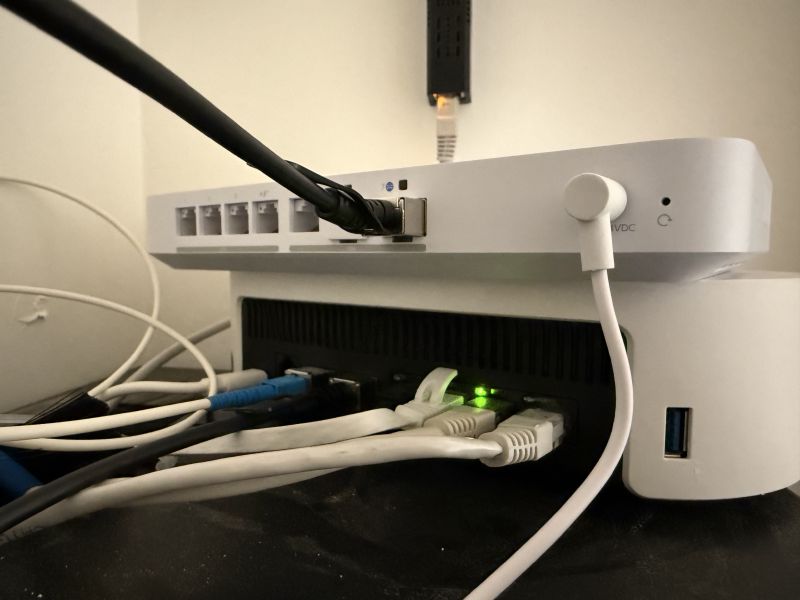
The UCG Fiber’s four 2.5 GbE downlink ports act as a built-in switch: each one is connected to an output on the patch panel to distribute the network across the different rooms.
The two U7 Lite#
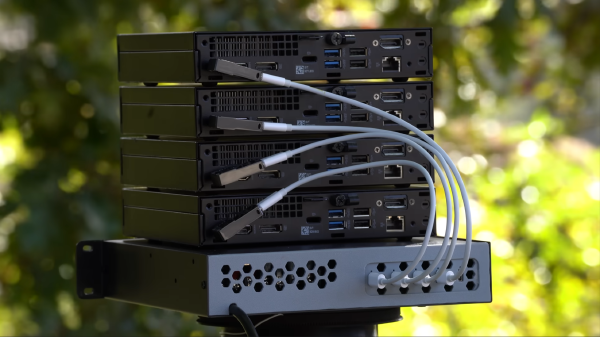
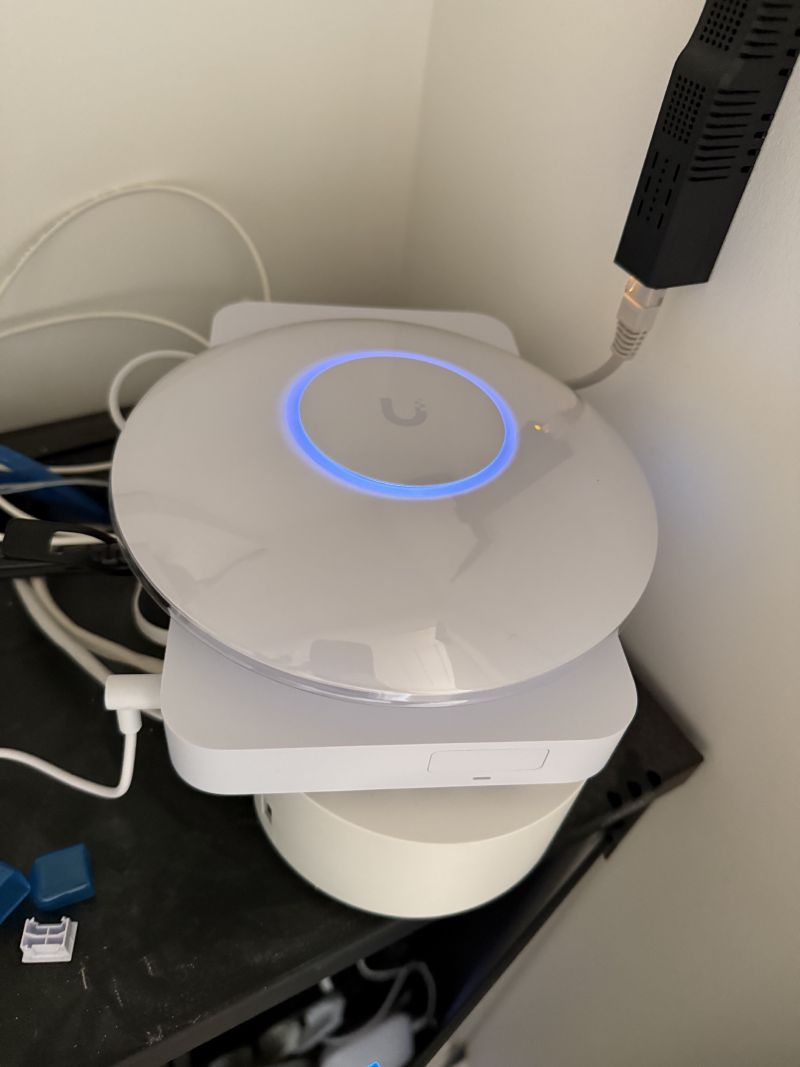
The first access point is perched on top of our pile of kit (still temporarily), a spot that lets it cover the main living area. It’s powered by PoE directly from the UCG Fiber and that port 4 provides 2.5 GbE of bandwidth.
The second one is installed in the office, connected to the Netgear switch over Gigabit for now. We stay at 1G on that segment until the next article, when the switch will be replaced.
You can see in the app the switch from WAN1 to WAN2, from Gigabit to 10GbE.
Configuring the UCG Fiber#
Time to actually configure a few things on our UCG Fiber. All the configuration happens from UniFi Network, the UniFi management interface. It’s accessible at unifi.ui.com or directly from the app.
Creating the VLANs#
First step: create the networks as planned in article 2. In UniFi Network, that happens in Settings > Networks > Add a network.
| VLAN | Name | Subnet | DHCP |
|---|---|---|---|
| 1 (Default) | Default | 192.168.0.0/24 | Yes |
| 2 | IoT | 192.168.2.0/24 | Yes |
| 3 | Lab | 192.168.3.0/24 | Yes |
| 4 | Guest | 192.168.4.0/24 | Yes |
| 5 | Management | 192.168.5.0/24 | Yes |
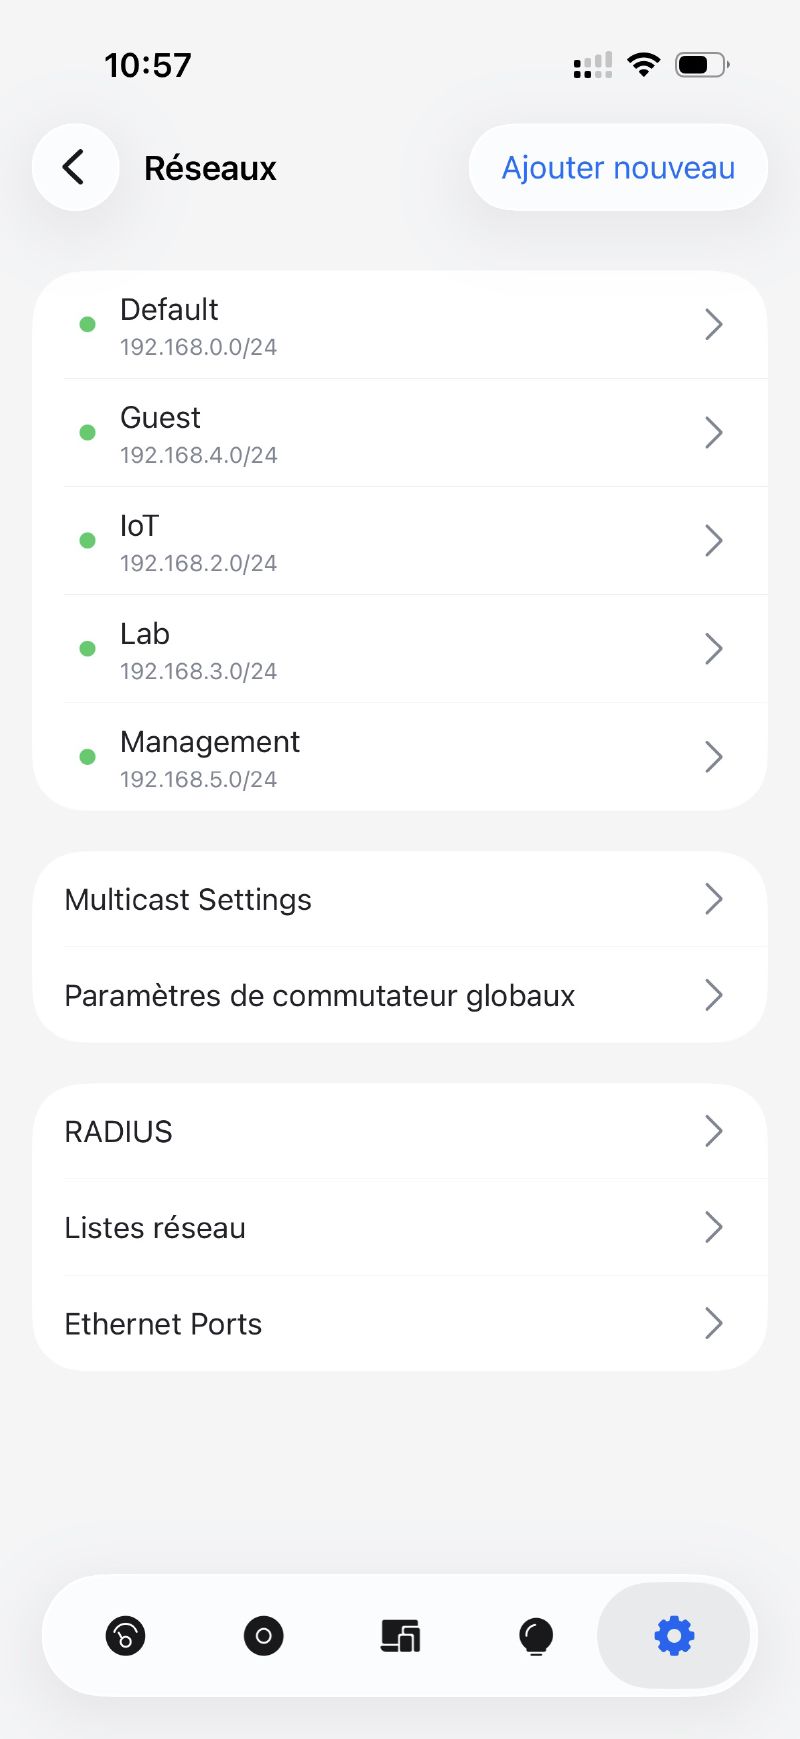
Each VLAN creates a distinct virtual network with its own address range. The UCG Fiber routes between them or not, depending on the firewall rules.
Firewall rules#
This is where the segmentation really pays off. In Settings > Policy Engine > Firewall, we create the rules that control what can talk to what.
The main rules:
- IoT → Default: BLOCKED. Connected things have no business seeing the machines on the main network.
- Guest → anything other than Internet: BLOCKED. Guests get Internet and that’s it.
- Lab → Default: BLOCKED except for explicit exceptions.
- IoT → Internet: ALLOWED, but limited. IoT devices can reach the Internet for their updates, to be refined later with DNS filtering.
- Home Assistant (Default VLAN) → IoT: ALLOWED. Home Assistant needs to be able to drive the home automation kit.
UniFi makes creating these rules pretty accessible with its visual interface. You define address groups, the ports involved and the action (accept/drop). No need to touch iptables commands.
Configuring the Wi-Fi SSIDs#
In Settings > Wi-Fi > Add a network, we create one SSID per use case, each attached to its VLAN (the names below are deliberately generic):
| SSID | VLAN | Security |
|---|---|---|
MyHome | Default (1) | WPA3 |
MyHome-IoT | IoT (2) | WPA2 (for compatibility) |
MyHome-Guest | Guest (4) | WPA2 |
The Lab and Management VLANs are not broadcast over Wi-Fi - access to network management and the homelab is wired only.
Migrating off the Freebox#
With the new SSIDs in place, I then move each device over one by one: phones, computers, printer, light bulbs, sensors… I reconfigure them to connect to the right Wi-Fi (home or IoT depending on the case). It takes a bit of time but it avoids cutting everything off at once and ending up with a device that becomes unreachable without a way to bring it back.
Once nothing is connected to the Freebox’s Wi-Fi any more, I disable its Wi-Fi from its admin interface. From that point on, the Freebox’s only job is to receive the fibre and pass it on to the UCG Fiber via the DAC cable. No other device is connected to it, wired or wireless.
Adopting the U7 Lite#
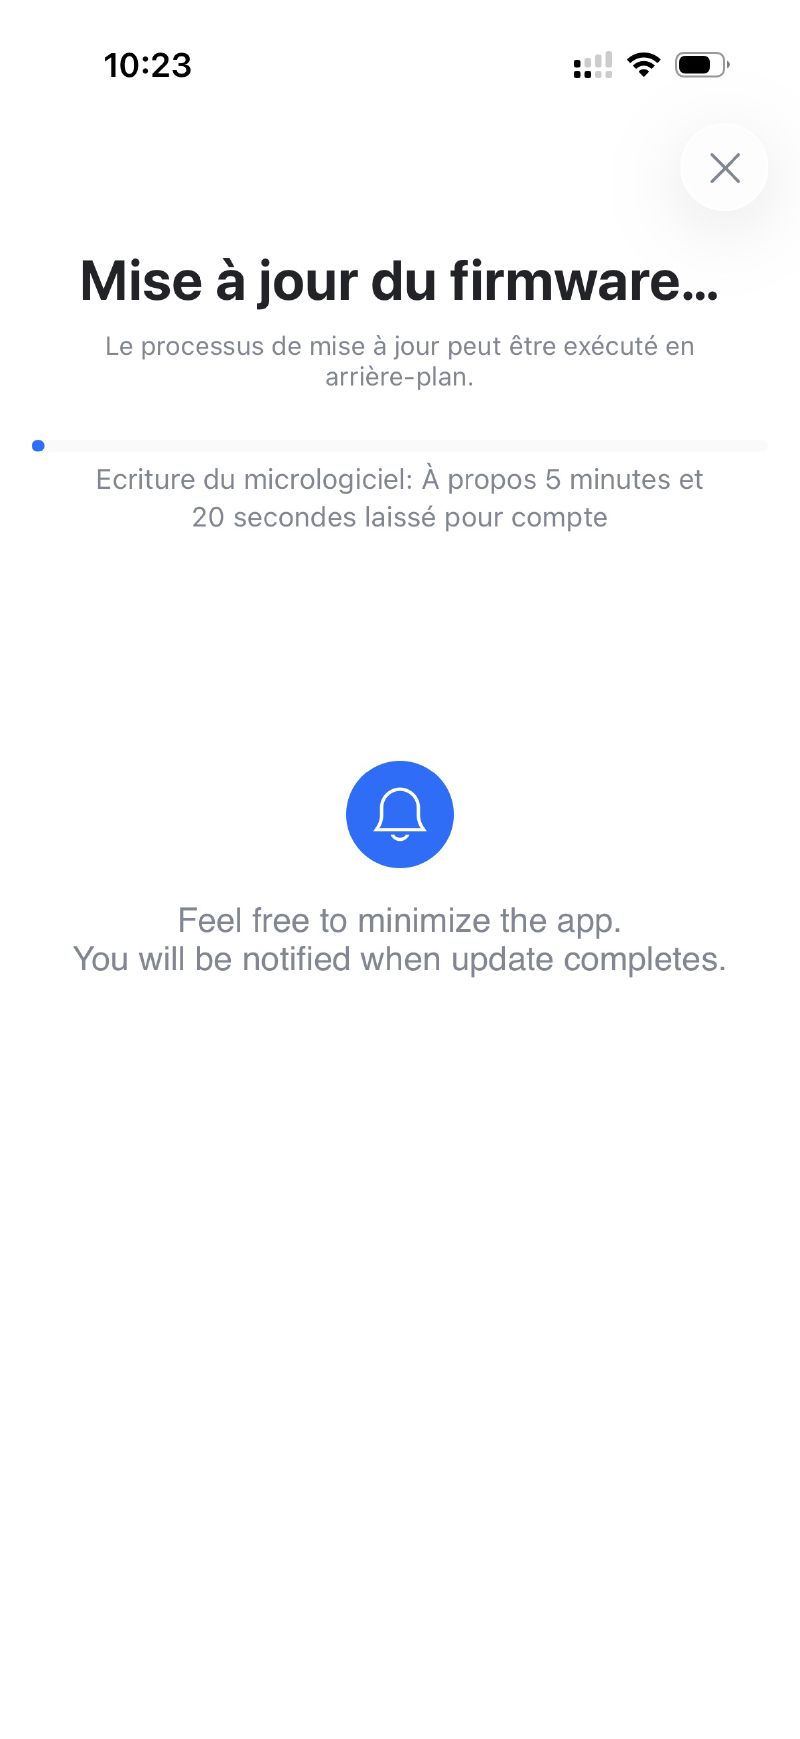
Once powered over PoE, the two U7 Lite show up on their own in UniFi Network, waiting to be adopted. One click and they join the controller.
On the back of that, the UCG Fiber pushes the latest firmware to each AP. A few minutes’ wait and they’re up to date, ready to broadcast.

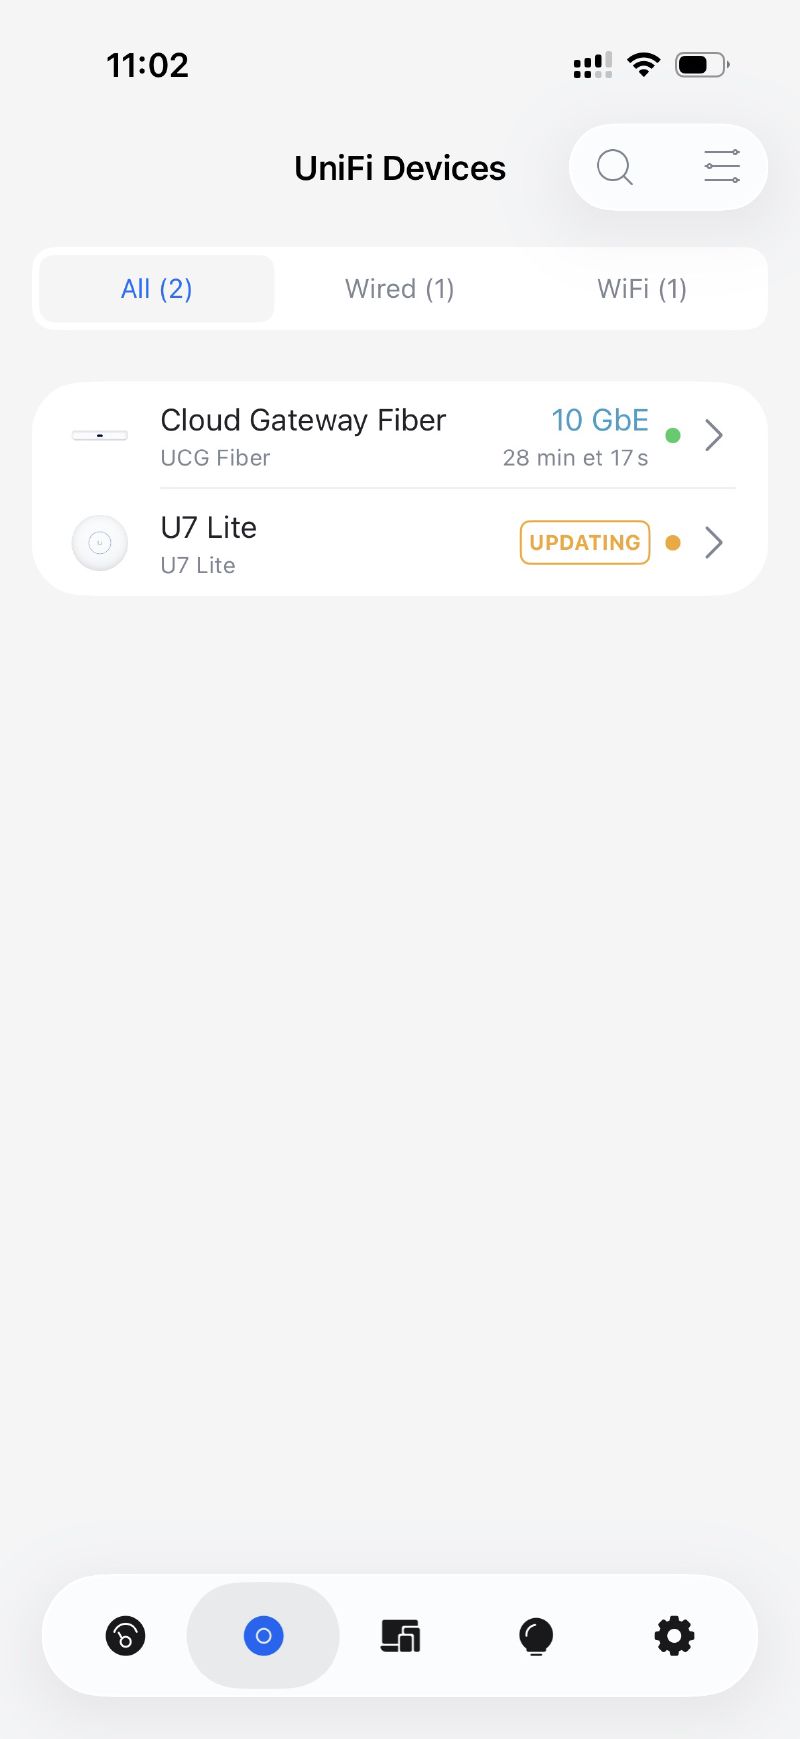
The two U7 Lite then automatically broadcast the three SSIDs on 2.4G and 5G. Roaming between the two access points is handled natively by UniFi via the 802.11r protocol - a client that moves around the flat hops from one AP to the other transparently.
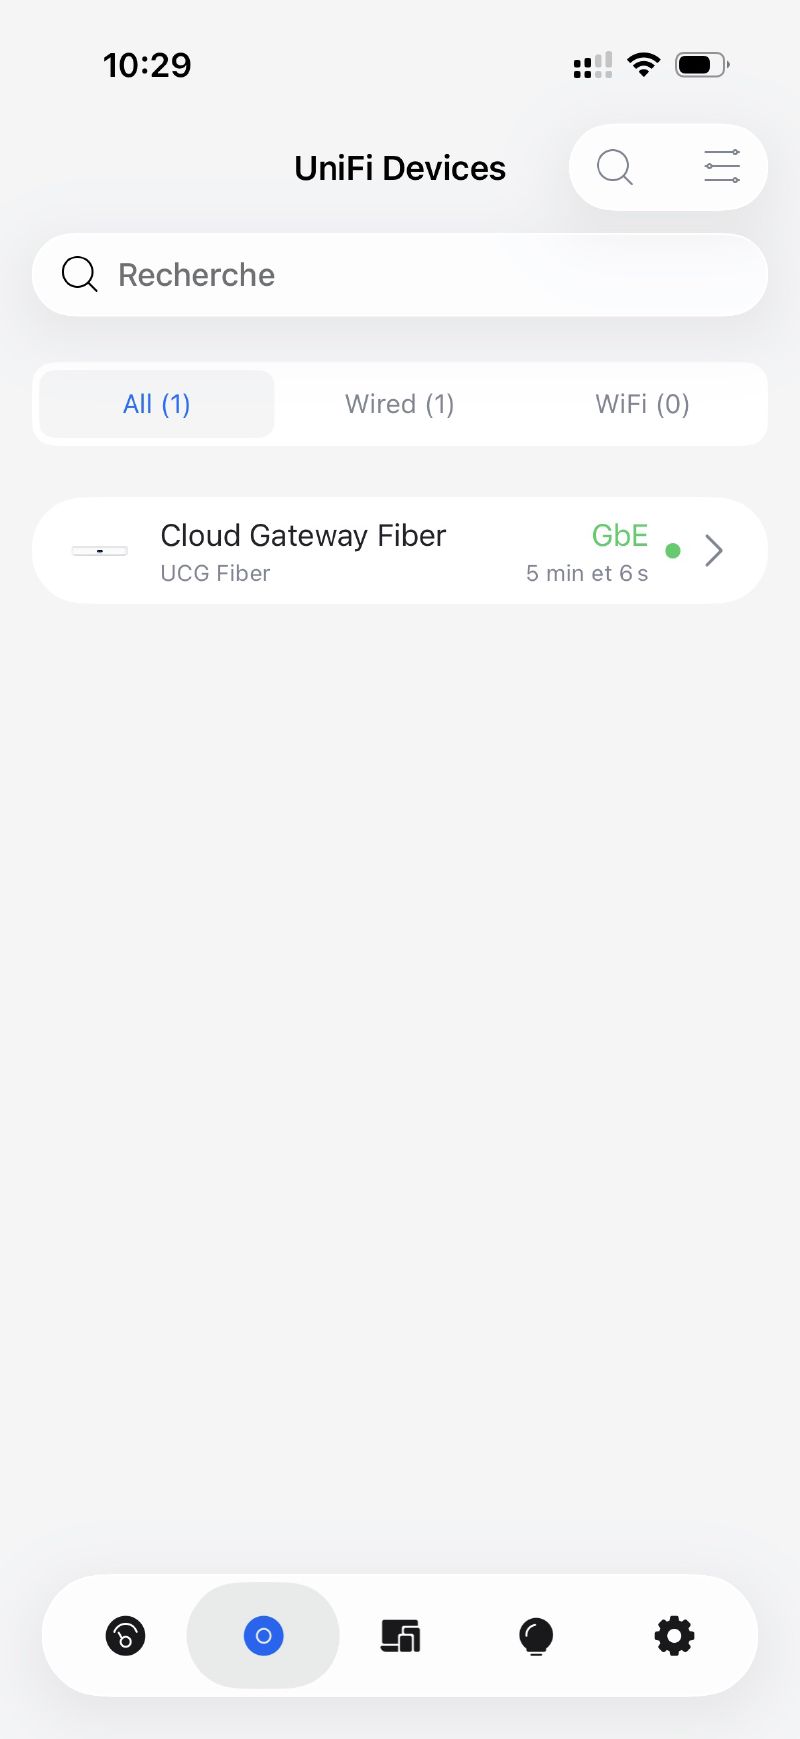
Final overview#
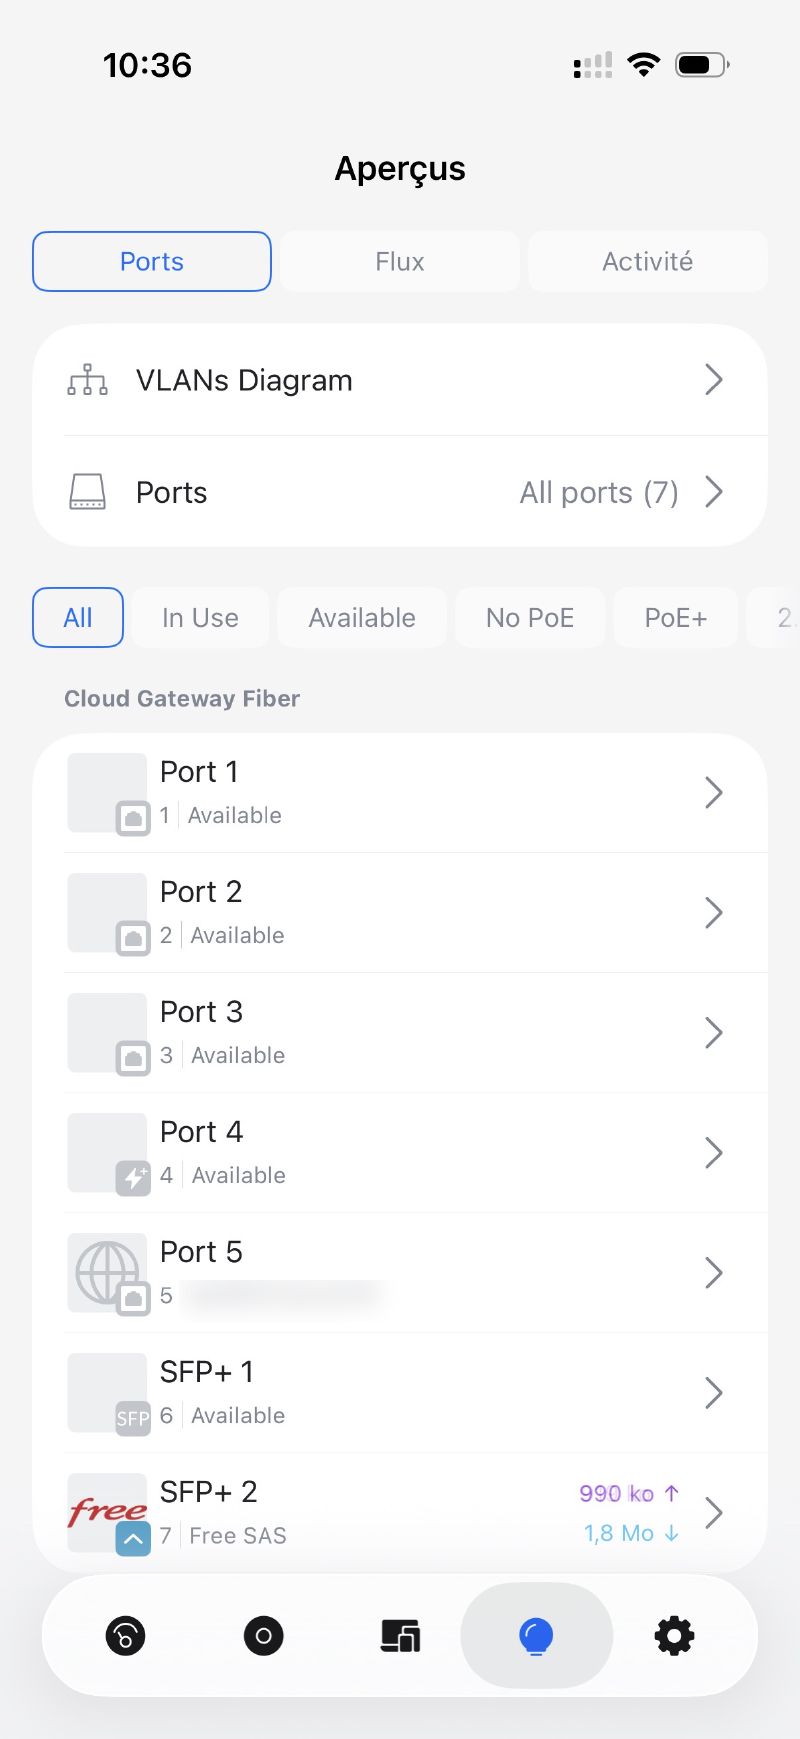
Once everything is in place, the devices view lists the UCG Fiber and the two U7 Lite, all connected and up to date. On the ports side, you can clearly see the PoE links to the APs and the 10G WAN on the Freebox side.
Speed tests#
First thing to check after the install: are we finally enjoying the fibre at full speed? The UCG Fiber has a speedtest tool built right into the UniFi Network interface, so no need to pull out other machines or external tools for an initial reading.
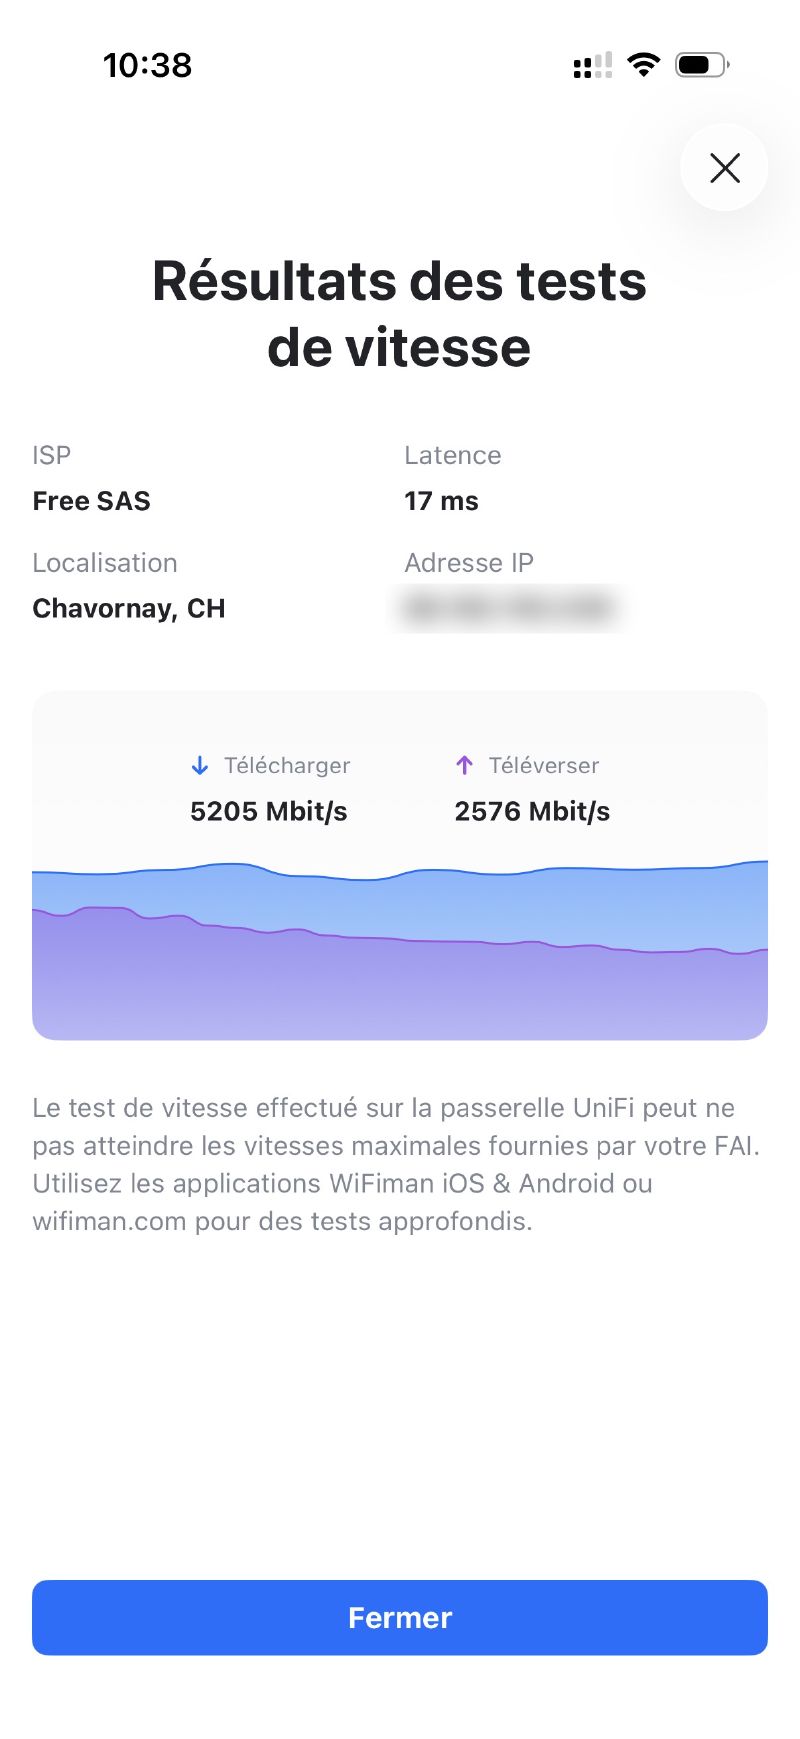
The result is pretty tidy:
- Down: ~5 Gbps
- Up: ~2.5 Gbps
On a theoretical maximum line of 8 Gbps symmetrical, that’s perfectly respectable for a test run from the router itself. I haven’t run any other tests yet, neither wired from a client machine nor over Wi-Fi - that’ll come later once the rest of the network is finalised (particularly the 2.5G switch replacing the Netgear).
First takeaways#
The install went off without any major surprises. Migrating devices from the Freebox’s Wi-Fi to the new UniFi SSIDs was the most tedious part, purely because reconfiguring each device one by one takes ages. The UniFi Network interface is genuinely pleasant to use, everything is accessible and logical.
What it concretely changes:
- WAN throughput: from 1 Gbps to ~8 Gbps (theoretical) - finally making the most of the fibre
- Segmentation: 5 distinct VLANs with firewall rules between them
- Wi-Fi: even coverage across the whole flat with seamless roaming
- Visibility: UniFi Network gives real-time stats on each client, each VLAN, each AP
There are still things to refine - the firewall rules will be fleshed out as I identify real needs, and the IoT VLAN will probably be paired with DNS filtering to limit outbound traffic to third-party servers.
The state of the network today and what’s next#
Here’s what the wired network looks like at the end of this install, with the various devices connected either directly to the UCG Fiber (at 2.5 GbE), or to the office’s Netgear switch (still capped at Gigabit):
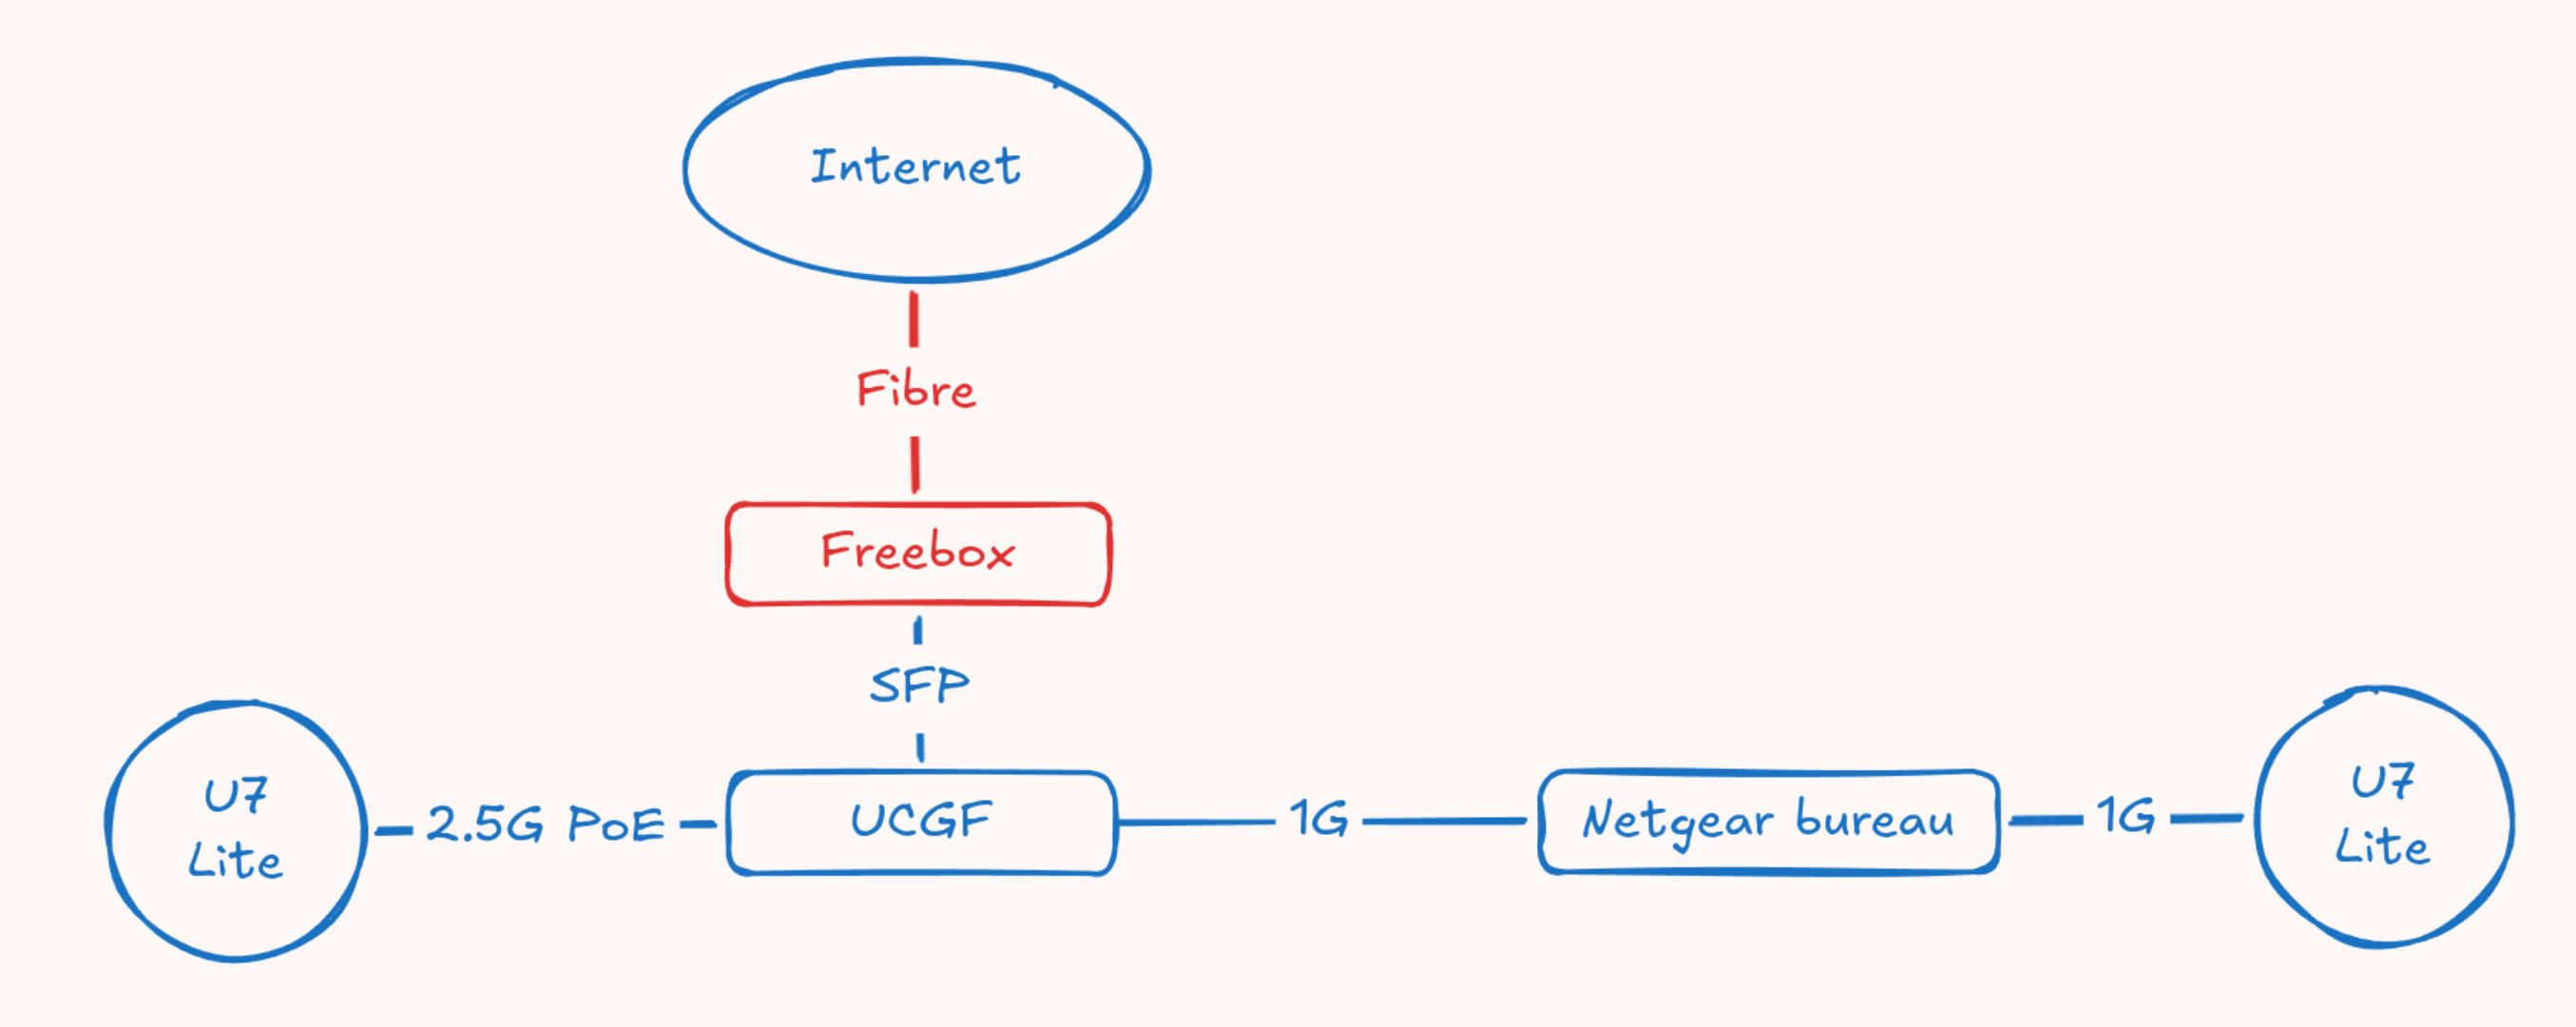
So there’s still a bit of work left on the network side: extending 10G to the office and increasing 2.5 GbE port density to cope with the homelab scaling up and future work machines. That’ll mean replacing the Netgear with a more capable UniFi switch, but that’s for another article.
That said, the foundations are solid enough that we can already start tackling the homelab in parallel. The next part will therefore be dedicated to:
- Clean reinstallation of the Proxmox cluster
- Organising VMs and containers
- Migrating the OPNsense node (which becomes redundant with the UCG Fiber)
- Connecting the homelab to the new network via the Lab VLAN
And to go with the homelab rebuild, I’ve also pre-ordered the Shrike Lab 1U PSU which should tidy up the power side of the mini PCs nicely - I talked about it in this dedicated article.
See you soon!