In part 6, we laid down the whole “everything in code” foundation: tooling, encryption key, repo skeleton and guardrails. Zero servers powered on, but the foundations were ready. I promised you the next one would finally get to the hardware. Here we are, and believe me, we’re going to get our hands dirty.
The goal of this phase 1: install Proxmox VE 9.2 on the three nodes of the future cluster and Proxmox Backup Server on the fourth, in an automated way via answer files. All starting from machines that already had Proxmox on them, so they need cleaning up first.
And let me warn you right away: the automated install itself is a non-event, it runs all on its own like a big kid. The real fight of this phase, the one that cost me the most hair (and I don’t have that much to spare), is getting the install media to boot in UEFI on OptiPlex machines. We get there, but hold on tight.
The hardware, and a first lesson about RAM#
A quick reminder of the inventory:
| Role | Machine | CPU | RAM | Disks |
|---|---|---|---|---|
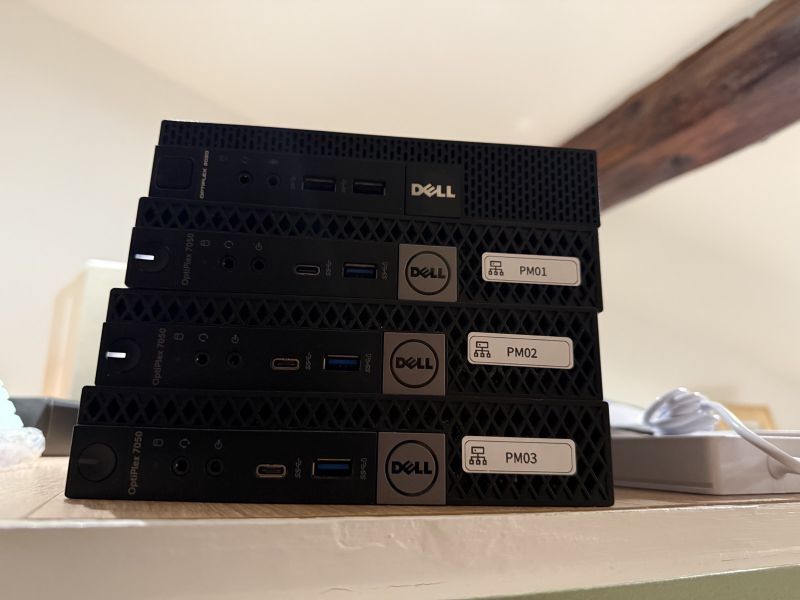
| pve01-03 | Dell OptiPlex 7050 Micro | i5 | 32 GB DDR4 | SanDisk 480 GB (OS) + Lexar 512 GB (VM) |
| pbs01 | Dell OptiPlex 9020 Micro | i5 | 8 GB DDR3L | SanDisk 480 GB |
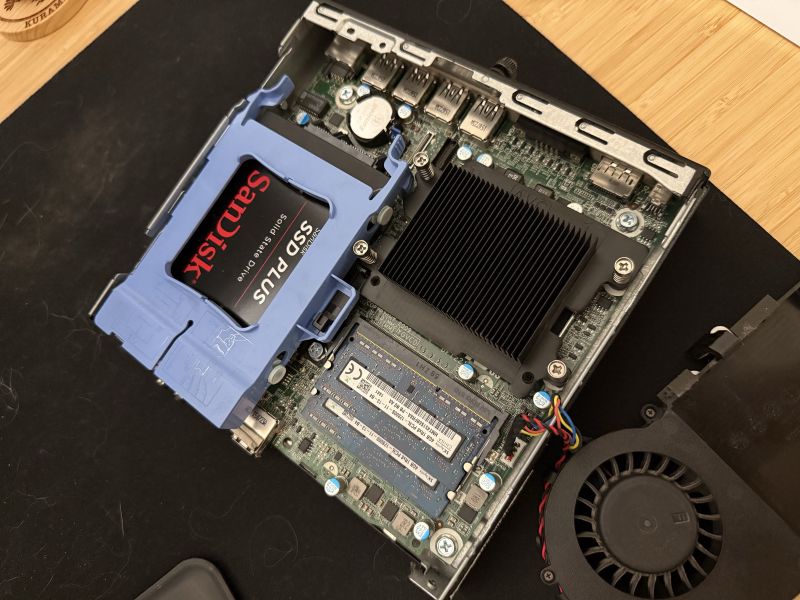
The RAM correction. In part 5, I announced 24 GB per PVE node. My mistake: after checking physically, each 7050 actually had one 16 GB stick and one 4 GB stick, so 20 GB. So I planned ahead by buying four second-hand 16 GB DDR4 sticks (thanks to the local classifieds): one per PVE to replace the 4 GB stick and move to 2x16 = 32 GB on the three nodes. The fourth stick was meant for the 9020 (pbs01), which I intended to bump to 16+4 GB… except I hadn’t noticed that the 9020 is DDR3L, not DDR4. Incompatible stick, so pbs01 stays at 8 GB for now; I’ll order the right DDR3L RAM later. Moral: check the type of RAM (not just the capacity) before ordering. It sounds obvious written down like this, a little less so when you’ve got the box open in front of you.
Aside: the JetKVM, my remote console#
Before going any further, a word about a little box that’s going to come up over and over in this article: the JetKVM. I mentioned it in part 5, it’s time to introduce it properly, because without it this whole phase would have been a lot more painful.
A JetKVM is a miniature KVM-over-IP. Concretely, it’s a small dongle that plugs into two ports of the target machine:
- Into the HDMI, to capture the screen image.
- Into a USB port, which plays a dual role: it powers the box (no separate power supply needed) and lets it pretend to be a keyboard, a mouse, and if needed a storage device (to mount an ISO).
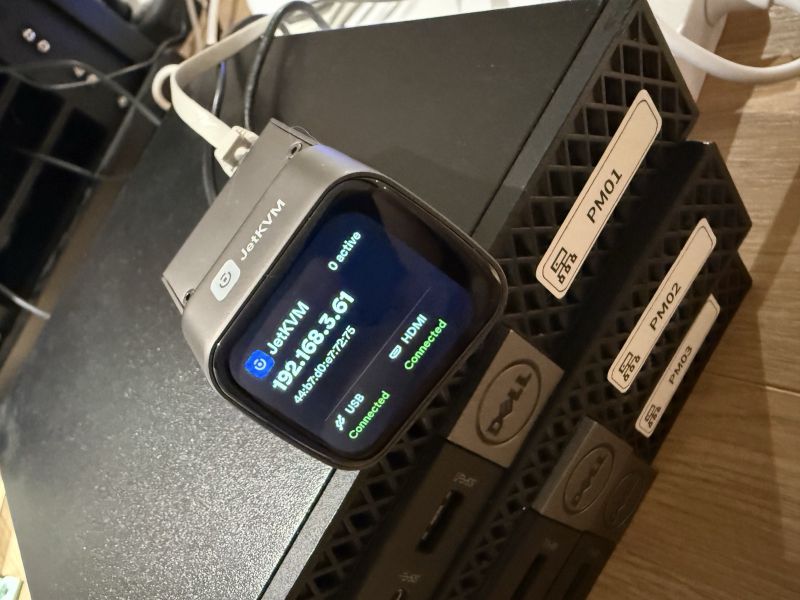
The box then exposes a web interface accessible from the network. Opening that page from my computer, I see the machine’s screen and drive it as if I were physically in front of it, including in the BIOS or even before an OS has booted. That’s the whole difference with a plain SSH access, which assumes the machine is already booted and joined to the network.
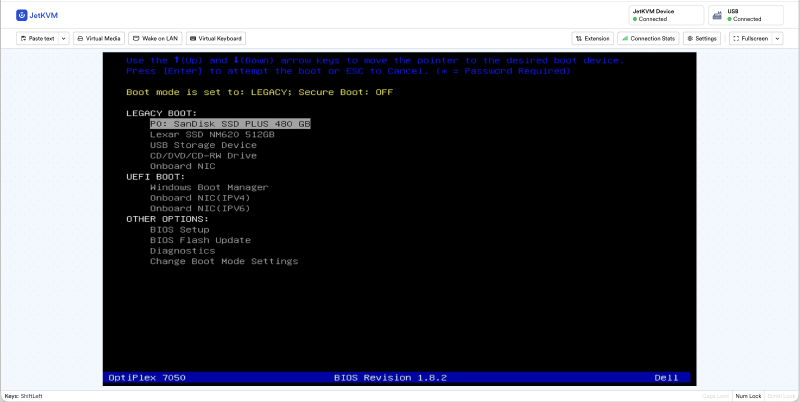
In my use case, it ticks three precious boxes for this phase:
- Mounting the Proxmox ISO remotely: I push the image from my machine, it shows up on the target machine as a CD/DVD drive or a virtual USB stick. No more walking over with a USB stick for every reinstall.
- Driving the BIOS and the install without a physical screen or keyboard plugged into mini-PCs stacked in a rack.
- Keeping a console access even when the machine no longer responds (kernel panic, wrong network setting…), whereas SSH would already be lost.
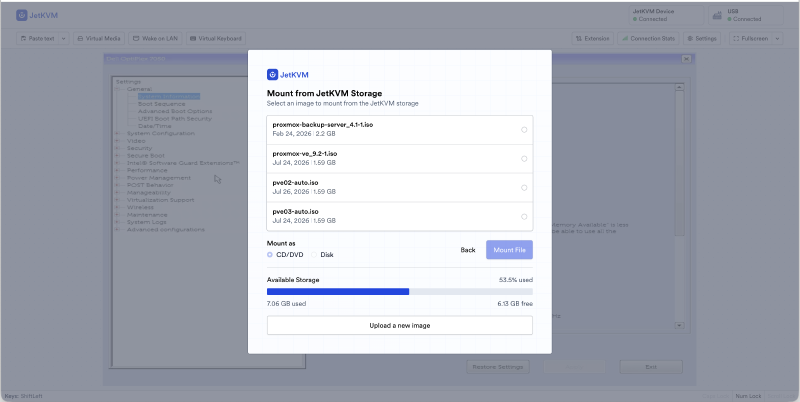
In short, it’s the tool that makes “drive everything remotely” possible on hardware that’s nothing like a server. It has its limits too, and you’ll see it gave me a hard time during the UEFI battle, but overall it’s a faithful companion for this phase.
Step 1: the bootstrap secrets#
True to the phase 0 principle, everything sensitive is generated then encrypted with SOPS before we even start.
First, an SSH key dedicated to the lab, with no passphrase. A deliberate choice: automation needs a key usable without intervention, and the protection comes from encryption at rest (SOPS + age), not from a passphrase.
ssh-keygen -t ed25519 -C "kentrowlab" -f "$HOME/.ssh/kentrowlab_ed25519" -N ""
chmod 600 "$HOME/.ssh/kentrowlab_ed25519"
Next, a randomly generated root password, then hashed in yescrypt. Since mkpasswd doesn’t exist on macOS, I go through a container:
PW=$(openssl rand -base64 24)
HASH=$(printf '%s\n' "$PW" | docker run --rm -i debian:trixie bash -c \
  'apt-get update -qq && apt-get install -y -qq whois && mkpasswd -m yescrypt -s')
All that’s left is to tuck it into SOPS. A small subtlety: the yescrypt hash contains $ characters, which the shell would happily interpret if we weren’t careful. So I go through yq with strenv(), which reads values from the environment without interpreting them:
PW="$PW" HASH="$HASH" \
PUB="$(cat ~/.ssh/kentrowlab_ed25519.pub)" \
PRIV="$(cat ~/.ssh/kentrowlab_ed25519)" \
yq -n '
  .root_password        = strenv(PW)   |
  .root_password_hashed = strenv(HASH) |
  .ssh_public_key       = strenv(PUB)  |
  .ssh_private_key      = strenv(PRIV)
' > secrets/bootstrap.sops.yaml

# Encryption in place (the age key is already configured from phase 0)
sops -e -i secrets/bootstrap.sops.yaml
So the secrets/bootstrap.sops.yaml file contains the public key and the private SSH key, plus the root password in plaintext and hashed all of it encrypted, ready to be committed.
Yes, I store the private SSH key too in SOPS. It’s consistent with “everything reconstructible from git”: the repo plus the age key are enough to recover everything, without multiplying the roots of trust to protect separately.
Yet another false positive on encrypted files#
No sooner had I added the encrypted file than ansible-lint choked:
yaml[line-length]: Line too long (656 > 160 characters)
secrets/bootstrap.sops.yaml:4
It discovers the encrypted YAML and complains about its endless lines (the base64 blobs). The fix: a .ansible-lint file at the root that excludes secrets/ and all *.sops.*:
# .ansible-lint
exclude_paths:
  - secrets/
  - "**/*.sops.*"
Plus the matching exclusion in the pre-commit hook, so the same rule holds locally and in CI. This is the third false positive of the series on encrypted files (after the SOPS hook and check-yaml in phase 0). The lesson is becoming a refrain: any tool that walks the repo has to learn to ignore *.sops.*.
Step 2: wiping for real#
The machines were already running Proxmox. Before reinstalling, we need a clean slate. And be careful, wipefs on its own isn’t enough: ZFS and LVM labels survive a simple partition erase and come back to haunt the next install like a bad ghost.
I boot on the Proxmox ISO, then Advanced Options → Install Proxmox VE (Debug mode) to drop into a shell.
A little trap: the first debug shell is a minimal busybox, without lsblk. You have to type exit to move on to the second shell, which is the complete one. It took me a while to understand why I was being asked to “quit” in order to continue.
Before destroying anything, I collect the machines’ info (we’ll see right after why this is critical):
lsblk -d -o NAME,SIZE,MODEL,SERIAL,TRAN
ls -l /dev/disk/by-id/ | grep -v part
ip -br link
modprobe zfs && zpool import
Then the wipe, command by command (multi-line input goes through the JetKVM badly):
vgchange -an          # disable LVM
dmsetup remove_all
wipefs -af /dev/sda ; sgdisk --zap-all /dev/sda ; blkdiscard -f /dev/sda
wipefs -af /dev/nvme0n1 ; sgdisk --zap-all /dev/nvme0n1 ; blkdiscard -f /dev/nvme0n1
lsblk # we should see bare disksTwo details that made me pause: poweroff fails (“System has not been booted with systemd”), you have to use poweroff -f. And above all, never touch sr0 (the JetKVM’s virtual ISO) or the USB stick. One wipe command on the wrong disk and you’re back for another round… at best.
Once the final lsblk shows bare disks, without the slightest partition or residual label, the machine is clean: we can move on to the install proper, on healthy foundations.
Step 3: targeting the right disk (by serial number)#
Here’s the point that justifies the whole collection pass earlier. My three nodes have disks from the same batch, with near-identical serial numbers:
NVMe : pve01 NM620XXXXXX668XX
       pve02 NM620XXXXXX677XX
       pve03 NM620XXXXXX667XX
These serial numbers are deliberately anonymised, but the gap between them is representative of the real thing: only two digits apart between the NVMe drives. Suffice to say that a wildcard filter (NM620XXXXXX66*) would match several disks at once.
And pointing to the disk by sda is just as fragile: the disk enumeration order can change from one boot to the next. The only reliable method is to target the OS disk by its full ID_SERIAL_SHORT in the answer file. It’s the kind of detail that saves you from installing the OS on the wrong disk and only realising three hours later, with your head in your hands.
The collection also revealed two other useful things: the network interface is called enp0s31f6 on the 7050s but eno1 on the 9020 (earlier generation), and the old install had put the OS on the NVMe. We flip that around: OS on the SATA, VM on the NVMe (faster and bigger, reserved for the future ZFS pool).
Step 4: the answer files#
The principle: I version templates (one per machine, as .toml.tmpl) with placeholders in place of the secrets, and a render.sh script fills them in from SOPS. That way, the repo only ever contains encrypted content, and the files actually used at install (which do contain the root hash in plaintext) are generated on the fly and gitignored.
Here’s what a template looks like, in this case pve01.toml.tmpl:
[global]
keyboard = "fr"
country = "fr"
fqdn = "pve01.ktw.ovh"
mailto = "contact@ktw.ovh"
timezone = "Europe/Paris"
root-password-hashed = "__ROOT_PASSWORD_HASHED__"
root-ssh-keys = ["__SSH_PUBLIC_KEY__"]

[network]
source = "from-answer"
cidr = "192.168.3.11/24"
gateway = "192.168.3.1"
dns = "1.1.1.1"
filter.ID_NET_NAME = "enp0s31f6"

# Targets the SATA SSD by its serial number (anonymised here). The NVMe is
# never mentioned: its ZFS pool will be created by Ansible in phase 2.
[disk-setup]
filesystem = "ext4"
lvm.maxroot = 100
lvm.maxvz = 0
filter.ID_SERIAL_SHORT = "174464XXXXXX"
A few points that matter in this file:
root-password-hashedandroot-ssh-keysare placeholders (__...__), filled at render time from SOPS. The template itself contains no secret, it can live in git without a worry.filter.ID_SERIAL_SHORTtargets the OS disk by its full serial number (the whole point of step 3).filter.ID_NET_NAMEisenp0s31f6for the PVE nodes,eno1for the PBS.lvm.maxroot = 100andlvm.maxvz = 0: a 100 GB root and nolocal-lvm, to leave the rest of the disk free for Ansible in phase 2.- The NVMe is never mentioned, so the installer doesn’t touch it at all.
The render script is deliberately simple: it decrypts the secrets just once, extracts the hash and the public key, then substitutes the placeholders in each template:
#!/usr/bin/env bash
set -euo pipefail

SCRIPT_DIR="$(cd "$(dirname "${BASH_SOURCE[0]}")" && pwd)"
SECRETS="$SCRIPT_DIR/../secrets/bootstrap.sops.yaml"
OUT="$SCRIPT_DIR/rendered"

umask 077
mkdir -p "$OUT"

PLAIN="$(sops -d "$SECRETS")"
HASH="$(printf '%s' "$PLAIN" | yq -r '.root_password_hashed')"
PUBKEY="$(printf '%s' "$PLAIN" | yq -r '.ssh_public_key')"
unset PLAIN

for tmpl in "$SCRIPT_DIR"/*.toml.tmpl; do
  out="$OUT/$(basename "$tmpl" .tmpl)"
  sed -e "s|__ROOT_PASSWORD_HASHED__|${HASH}|" \
      -e "s|__SSH_PUBLIC_KEY__|${PUBKEY}|" \
      "$tmpl" > "$out"
  echo "rendered: $out"
done
Two details I like in this script: the umask 077 at the top guarantees the rendered files come out with 600 permissions (they contain the root hash, so they might as well be readable by me only), and the unset PLAIN avoids leaving the decrypted secrets lying around in a variable longer than necessary.
All that’s left is to run the render and check that no placeholder remains:
./answer-files/render.sh
grep -c '__' answer-files/rendered/pve01.toml   # 0 = no placeholder left
An important point not to forget: the rendered files contain the root hash in plaintext, so they have no business being in git. We add the output folder to .gitignore:
# Rendered answer files: contain the root hash
answer-files/rendered/
What gets versioned are the templates (*.toml.tmpl) and the encrypted secret; what contains the hash in plaintext stays local. True to the principle from the start: in git, we only put encrypted or harmless content.
Step 5: building the auto-installable ISOs#
To turn an answer file into an ISO that installs on its own, Proxmox provides the proxmox-auto-install-assistant tool. Small snag: it’s an amd64 Debian package, and I work on an M1 Mac (ARM). Rather than install it natively, I lock it inside a Docker container (built from a versioned Dockerfile), launched under linux/amd64 emulation. It’s slow, but we’re not counting seconds here, and above all it stays reproducible.
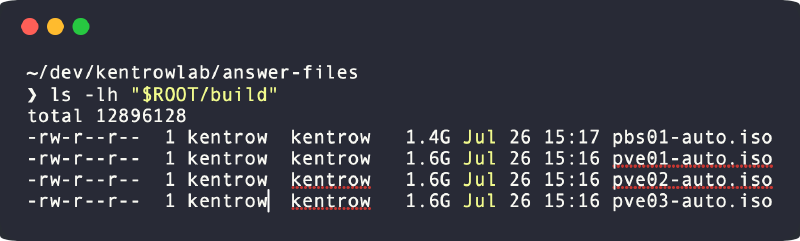
The build-isos.sh script orchestrates all of it: it builds the image, validates the four rendered answer files, then generates the ISOs (the three PVE, then the PBS):
#!/usr/bin/env bash
set -euo pipefail

ROOT="$(cd "$(dirname "${BASH_SOURCE[0]}")/.." && pwd)"
IMG="kentrowlab/pve-iso-builder"
DOCKER_RUN=(docker run --rm --platform linux/amd64 -v "$ROOT:/work" -w /work "$IMG")

PVE_ISO="${PVE_ISO:-iso/proxmox-ve_9.2-1.iso}"
PBS_ISO="${PBS_ISO:-iso/proxmox-backup-server_4.2-1.iso}"

mkdir -p "$ROOT/build"
docker build --platform linux/amd64 -t "$IMG" "$ROOT/answer-files"

for n in pve01 pve02 pve03 pbs01; do
  echo "== validating $n"
  "${DOCKER_RUN[@]}" proxmox-auto-install-assistant validate-answer \
    "answer-files/rendered/$n.toml"
done

for n in pve01 pve02 pve03; do
  echo "== building ISO $n"
  "${DOCKER_RUN[@]}" proxmox-auto-install-assistant prepare-iso \
    "$PVE_ISO" --fetch-from iso \
    --answer-file "answer-files/rendered/$n.toml" \
    --output "build/$n-auto.iso"
done

echo "== building ISO pbs01"
"${DOCKER_RUN[@]}" proxmox-auto-install-assistant prepare-iso \
  "$PBS_ISO" --fetch-from iso \
  --answer-file "answer-files/rendered/pbs01.toml" \
  --output "build/pbs01-auto.iso"

ls -lh "$ROOT/build"
The validation step is the reassuring one: each file is scrutinised before anything is burned.
The answer file was parsed successfully, no errors found! (x4)At the end, four auto-installable ISOs await me in build/: three for the PVE nodes, one for the PBS. Each contains its answer file and just needs to boot on the right machine.
Step 6: the install, and the battle of the UEFI boot#
Here’s the heart of the story, the one for which I nearly went looking for a physical screen and keyboard several times, sighing all the way. Once again: the auto-install runs on its own and targets the right disk, it’s a non-event. But getting the virtual media to boot in UEFI on OptiPlex 7050 machines was a real fight. Here’s the honest chronology, because that’s where you learn (and a little so you don’t repeat my mistakes).
1. pve03, first install. Booted in Legacy with the ISO mounted as CD/DVD: works on the first try. Chuffed, I don’t yet realise the trap I’m setting for myself.
2. The realisation. A cluster must be homogeneous. If one node is in Legacy and the others in UEFI, you expose yourself to different behaviours. Decision: move everything to UEFI. So I reinstall pve03 in UEFI. Easy, right? No.
3. pve02 in UEFI: the cascade of blockers.
Selected boot device failedwhen the media is mounted as CD/DVD (it just doesn’t appear in UEFI).- Mounting the media in Disk mode, it boots… but the “Automated Installation” menu disappears, or the installer looks for the ISO by its identifier and fails with
no device with valid ISO found. - Icing on the cake: a conflict between the JetKVM’s virtual keyboard and the USB mass-storage. In Disk mode, the virtual keyboard goes silent. Workaround with a physical keyboard, or by playing with the boot order. That’s the moment my faithful companion let me down a bit.
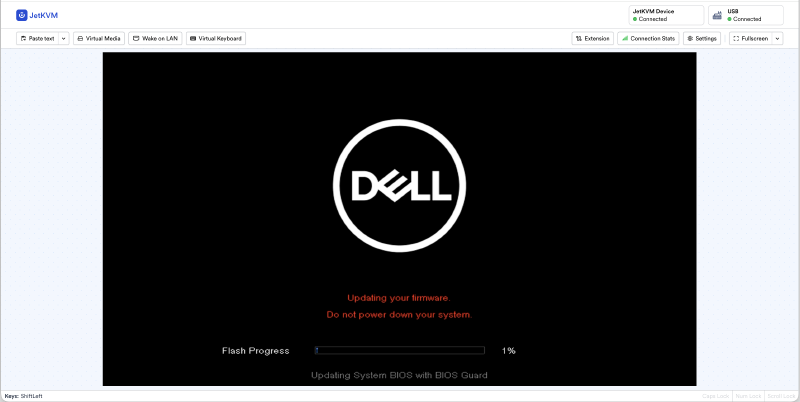
4. The BIOS flash. The 7050s were on version 1.8.2, well behind. Bumped to 1.27.0. Necessary, but not sufficient on its own.
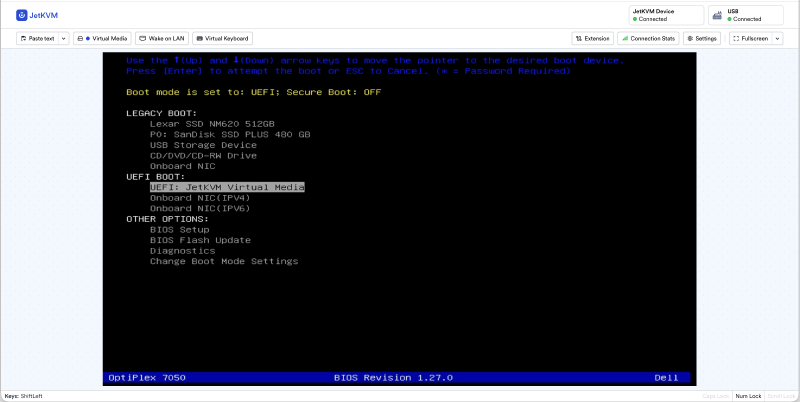
5. What eventually worked. The winning recipe, after a fair bit of fumbling and a few swear words: BIOS factory reset + Legacy Option ROMs unchecked + pure UEFI + freshly regenerated ISOs + mounting as CD/DVD. And there, at last, the CD/DVD entry appears in UEFI and the auto-installer runs normally. Victory.
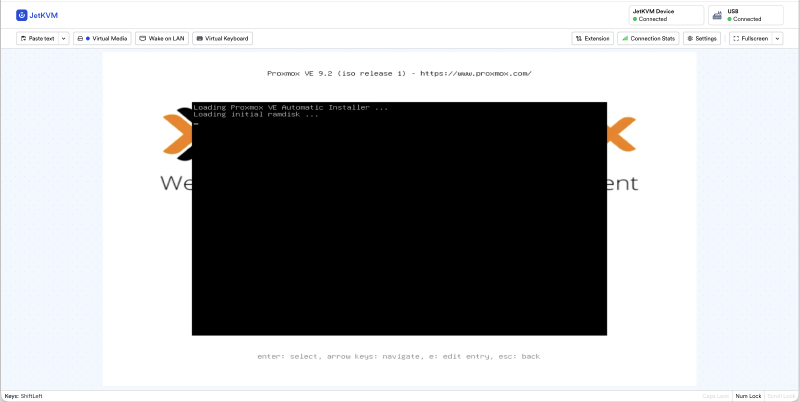
Once the recipe was found, all that was left was to replay it: I applied exactly the same settings on the three 7050s, and pve01, pve02 and pve03 installed identically, this time without flinching. That’s the whole benefit of having sweated over the first one: the next ones become a formality.
The reference BIOS settings#
The real lesson of this phase is that you have to freeze your BIOS settings and your boot mode BEFORE installing the first node, not on the third one. Here’s the reference configuration I ended up applying identically on all the machines:
| Setting | Value |
|---|---|
| Boot List Option | UEFI |
| Enable Legacy Option ROMs | unchecked |
| Enable Attempt Legacy Boot | unchecked |
| Secure Boot | OFF |
| SATA Operation | AHCI |
| Enable UEFI Network Stack | checked |
| Integrated NIC | Enabled w/PXE |
| Virtualization (VT-x + VT-d) | ON |
| Wake-on-LAN | ON |
| JetKVM ISO mount | CD/DVD (once the NVRAM is clean) |
The boot mode (UEFI vs Legacy) isn’t a cosmetic detail: it’s an architecture decision that must be deliberate and uniform across the whole cluster. My mistake was letting the first node decide for me because “it worked”.
pbs01: a good old USB stick#
For the 9020, the choice was quick, but not really out of desire: the JetKVM only takes HDMI as input, whereas this old 9020 only outputs to DisplayPort and VGA. Without buying an adapter specially, there’s no way to connect it to the JetKVM. Never mind, I get out the physical screen and keyboard, and I take the opportunity to avoid replaying the JetKVM UEFI battle. A flashed USB stick boots without the slightest tantrum in UEFI anyway:
diskutil list
diskutil unmountDisk /dev/diskN
sudo dd if=build/pbs01-auto.iso of=/dev/rdiskN bs=4m status=progress
diskutil eject /dev/diskN
(I took the opportunity to flash the 9020’s BIOS from A07 to A19, with the same reference settings.) Sometimes, the old method that works on the first try does a world of good.
Step 7: the post-install checks#
After each reboot (media ejected), a small check from the Mac. We first clean up the known host key (reinstall on an IP already seen), then verify the boot mode, the hostname, the disks and the RAM:
ssh-keygen -R <ip>
ssh -i ~/.ssh/kentrowlab_ed25519 root@<ip> \
  "[ -d /sys/firmware/efi ] && echo UEFI || echo LEGACY; hostname -f; lsblk; free -h"
Results obtained:
| Node | IP | UEFI | RAM | OS / disks |
|---|---|---|---|---|
| pve01 | .11 | 31 Gi | sda + /boot/efi, root 100 GB, NVMe blank | |
| pve02 | .12 | 31 Gi | sda + /boot/efi, root 100 GB, NVMe blank | |
| pve03 | .13 | 31 Gi | sda + /boot/efi, root 100 GB, NVMe blank | |
| pbs01 | .20 | 7.7 Gi | sda + /boot/efi, root 422 GB (see discrepancy) |
Points validated everywhere: boot in UEFI (/boot/efi present), OS properly on the SATA, NVMe intact and blank (reserved for the phase 2 ZFS pool), access by SSH key on the first try (public key injected at install), and correct FQDN. The web interfaces respond: PVE on :8006, PBS on :8007.
A discrepancy to fix in phase 2#
On pbs01, the root takes up the whole disk (422 GB) whereas my lvm.maxroot aimed to reserve the rest for the datastore. The same answer file doesn’t behave strictly identically between PVE and PBS. Nothing blocking (the PBS datastore can live in a directory on the root), but I’ll fix it cleanly in phase 2 with Ansible.
A good reflex to keep: never assume that a shared answer file produces an identical result on two different products. You always check the partitioning you actually get.
Where things stand after phase 1#
- Three PVE nodes (pve01-03): Proxmox VE 9.2, UEFI, 32 GB, BIOS 1.27, identical reference settings, blank NVMe ready for ZFS
- pbs01: Proxmox Backup Server, UEFI, 8 GB, BIOS A19
- All four reachable by SSH key, with their FQDN in
ktw.ovh - PBS datastore to resize in phase 2 (discrepancy on
maxroot)
The hardware is finally standing, homogeneous and clean. And above all, apart from the UEFI battle (which, sadly, doesn’t replay itself in code), what’s installed is entirely described by the repo: answer files, encrypted secrets, reproducible ISOs. If a machine has a problem tomorrow, I start again from the same point in a few commands.
And now?#
The four machines are running, but they don’t know each other yet. In part 8, we move on to Ansible: no-subscription repositories, host configuration, creating the ZFS pool on the NVMe drives, and finally standing up the three-node cluster. That’s the moment four isolated machines become a real cluster.
See you soon!